My first article in this series detailed my steps to get Ubuntu to dual boot on a MacBook Pro. Now, I want to talk about what you can do to soften the jolt of leaving the macOS ecosystem. While many things will look familiar, there are some essential differences. I suggest you take a minute and read through the Ubuntu Desktop Guide. I keep finding something there that I wish I had known before I started monkeying around with my Desktop.
If you have selected "Normal Installation" and made it this far, you should have a variety of pre-installed applications. A few of these default apps should be already added to the dash. I suggest reading about how the dash works. It's a little different from the macOS dock.
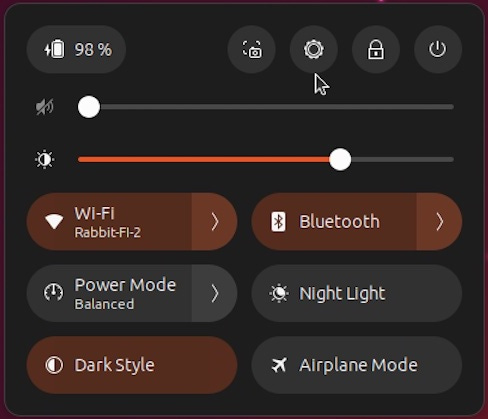
The first step was to select the System menu in the screen's top right corner. This menu provides shortcuts to features we will use later.
No Wi or Fi?
If the Wi-Fi button doesn’t appear, you should review my notes in part 1 of this series. If this was a T2 Mac, you can copy the firmware over from the macOS partition.
I discovered the firmware was unavailable when I installed Ubuntu on a 13-inch MacBookAir(6.2) model from an earlier generation. However, the laptop was equipped with a built-in Wi-Fi device. Apple typically uses one of the Broadcom chips for Wi-Fi, and it is possible to reinstall a driver. We can determine the model by using the terminal app.
lspci -vnn | grep Network
e5:00.0 Network controller [0280]: Broadcom Inc. and subsidiaries BCM4364 802.11ac Wireless Network Adapter [14e4:43a0] (rev 03)
	Subsystem: Apple Inc. BCM4364 802.11ac Wireless Network Adapter
You can find a detailed discussion of how to reinstall the drivers here. You will need the USB Wi-Fi adapter I mentioned in part 1 to give you networking to download the drivers. After some fussing, I found the following steps worked for me.
sudo apt install --reinstall firmware-b43-installer
sudo apt install --reinstall linux-firmware
As per the instructions, I also created a /etc/rc.local file and added a few lines
#!/bin/bash
modprobe -r b44 b43 b43leacy ssb brcmsmac bcma
modprobe -rf wl
modprobe -vv wl
System Settings
Back to the system menu I described above. The gear icon is a shortcut to the System Settings panel. One of the first things was to change several things to suit my aesthetics. Most items are obvious, but one that surprised me was hidden in the Multitasking tab. Ubuntu’s default behavior is full screen a window when it touches the top bar of the screen. I found it distracting. To disable that behavior, turn off the "Active Screen Edges" option.
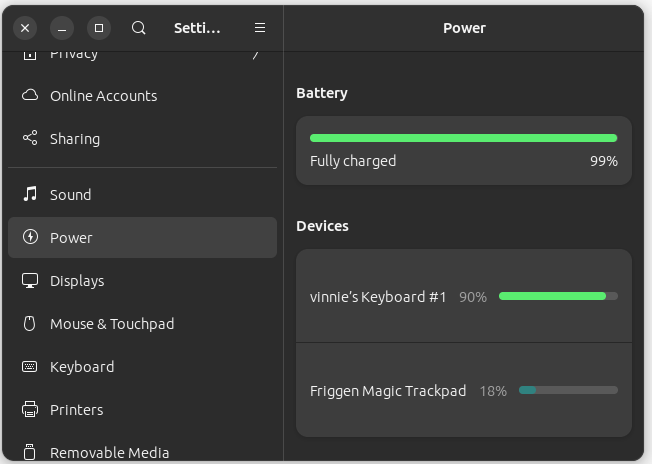
I had no issues using Bluetooth to connect an Apple keyboard and trackpad and attaching a large screen. This allowed me to operate the MacBook as a desktop, and the lid closed. It would be more convenient to have the battery levels displayed on the top bar instead of navigating to the power section of the System settings.
Let’s get some Software.
I found this confusing. If you type “software” into the activities bar, it will show at least four items:
Software - This is the Ubuntu equivalent of the App Store
Software Updater - which is used to see if updates are available.
Software & Updates - This gives some control over which repositories you can get software.
Additional Drivers - As far as I can tell, this is a shortcut to the Additional Drivers pane of the Software & Updates application.
You can use the Software app to download various programs and add-ons for Ubuntu and take inventory of what apps you have installed. The best I can tell, software comes packaged in three different ways.
Snap - Ubuntu supports this package format out of the box.
FlatPak - A decentralized system that works on several Linux platforms. The Flatpaks run in a sandboxed environment. You can find the apps on the FlatHub site.
AppImage - Simple format, no installation; download and run the app.
There is much more to discuss about the pros and cons of each package format. It would require multiple articles to cover everything. There are a few steps to getting Flatpak and AppImage support.
sudo apt install flatpak

flatpak remote-add --if-not-exists flathub https://flathub.org/repo/flathub.flatpakrepo

sudo apt install gnome-software-plugin-flatpak

# restart the system
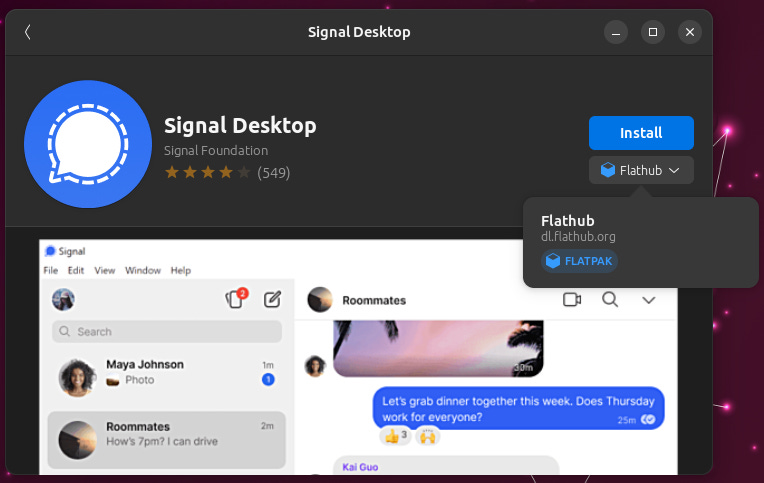
The next time you run the Software app, it will download a more extensive catalog. You can check this by looking up the Signal app. It should have an indicator that it is hosted from the FlatHub system.
Sometimes, I find the same app on multiple systems, but the Flathub is a few versions newer. Your mileage may vary.
Restricted Extras
Ubuntu maintainers only wanted to include open-source software not encumbered by patents, for example, MP3 or H.264. You can add those back in by installing the ubuntu-restricted-extras from the terminal.
sudo apt install ubuntu-restricted-extrasDesktop Tweaks and Extensions
I realize that part of switching from macOS to Ubuntu requires me to adapt to their culture, but there are some desktop customizations I want to bring over.
Thankfully, numerous extensions are available to tailor the desktop's appearance and functionality. As with any software distribution, differing opinions exist on which features should be included by default. The great news is that adding these features is a simple process.
First on my list is the gnome Extension Manager, not to be confused with Extensions. (Both of which can be installed from the Software app.) . The Extension Manager is an easy way to browse and add great customizations.
The other useful app is the gnome tweak tool, which allows you to customize the icons and themes as well as fine-tune the experience a bit more.
Installing the gnome tweaks tool can be done by the command line.
sudo add-apt-repository universe

sudo apt install gnome-tweak-tool
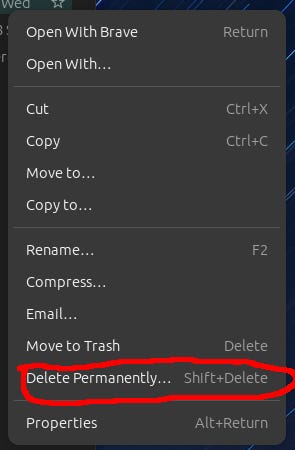
While you are in the command line, another feature I like to add is the ability to delete a file directly and skip the trash can from the desktop menu.
You can turn on this feature by setting the preference from the terminal.
gsettings set org.gnome.nautilus.preferences show-delete-permanently trueAnother feature that the desktop should include by default is sushi, the gnome equivalent of the macOS Quick Look file preview. You can add this in easily.
sudo apt install gnome-sushiOne more minor addition I made was to add the ability to minimize an app when I clicked on the icon in the dash.
gsettings set org.gnome.shell.extensions.dash-to-dock click-action 'minimize'For more control of the dash, you can add the Dash to Dock extension by clicking the install button from the gnome webpage.
Accessorize!
There are countless themes and icons available to personalize your desktop experience. The choice ultimately comes down to personal preference.
In my next installment, I will discuss which apps I installed for my day-to-day use.
There are endless themes and icons that you can use to customize your desktop experience. Which one to use? I leave this as an exercise in taste for the reader.
