I’ll be the first to admit that I have had a love-hate relationship with macOS for nearly 40 years. My first encounter with a Mac was through friends who founded Coral Common Lisp in 1986. I was blown away by Apple’s ability to incorporate some of the tremendous cutting-edge technology of the time into a product meant for everyday consumers. This inspired me to establish a consulting firm specializing in creating system extensions and network hardware drivers for macOS. Eventually, I moved out west to work for Apple Computer. I spent a few years helping third-party developers create their own cool stuff for the Mac. Often, in places, Apple didn’t understand themselves. Later, I worked on the macOS itself. After leaving Apple, I became more involved in the privacy and cryptography industry and got involved with a few startups.
So you can believe me when I say I have experience with macOS and Apple from a few perspectives. You may be wondering why, after nearly 40 years, I would want to leave.
Could It be that I abhor the politics?
Could it be that I finally grew tired of Apple’s abject politics? I don’t want to turn this article into a political scree. Still, I firmly believe in a Constitutional Republic where national politics is executed by representatives elected by the people, not by corporate executives or institutional investors. I strongly disapprove of actions such as colluding with other high-tech giants to influence the presidential election, censorship of free speech by banning anyone with opposing views from the App Store, and selective intervention in global politics by imposing sanctions on Russian citizens while at the same time ignoring slavery in China. Additionally, I was distrustful of Apple’s foaming-at-the-mouth eagerness to create a contact tracing system. Or maybe I find the whole pregnant man memoji reprobate.
It sure feels like the post-Jobs Apple lost its mojo somewhere along the way.
I know what probably happened. A new high-level manager at Apple picked up some old dusty videotape off the shelf labeled "Super Bowl 1984", played it and said, "Yah know, that guy on the screen was making a hell of a lot of sense until that trouble-makin' bitch smashed it!" — Jim Bell
But these are things that I can’t change, but I don’t have to be part of. Not that Apple is any different from most of Silicon Valley. Google is a surveillance and manipulation platform, and Microsoft never had a heart, and well, Facebook. Need I say anymore?
Hate the Software - Love the Hardware.
But it’s more than the disingenuous politics. The bloat of unnecessary features in macOS and iOS was the final straw. I genuinely feel that Apple has lost its innovative edge and is now relying on superficial dalliances to try and make up for it. Additionally, Apple forces these features on users and developers with every latest system update. And frankly, the user experience is not what it was.
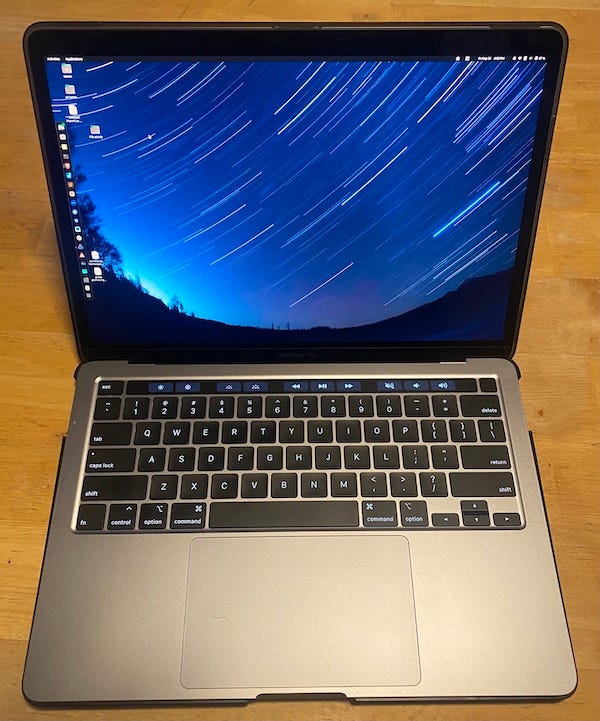
The sad thing is that I love the hardware. I think the 13” MacBook Pros prior to the Apple-Silicon release in 2020 were some of Apple’s most stunning laptops. Even presently, they possess admirable performance, a brilliant screen, and outstanding battery life. I have had some luck acquiring them at a reasonable cost in the refurbished market, with the option to purchase AppleCare.
What are my choices?
For now, I will only focus on non-Apple-Silicon devices. This expands our options for finding an alternative to macOS. Personally, I have grown fond of the newer versions of Linux, which offer a wide variety of distributions to choose from.
After some research, I chose Ubuntu Desktop. I like their philosophy of long-term support releases (LTS). I don’t have to worry that my software will break whenever the engineers decide that they need to add the latest shiny thing. I am also a huge fan of the open-source security approach. Although there are security-centric versions of Linux like PureOS, I really like the day-to-day usability of Ubuntu 23.04 (Lunar Lobster).
Preparing to install Linux
Let’s start with the following warning:
Read through the whole article before you attempt to install Linux
Depending on your choice of hardware, this can be easy or a little more challenging. Either way, you are going to need a few things in advance.
USB flash drive at least 4GB of storage.
Another USB drive to move some utilities around from macOS to Linux later.
Optionally, whatever silly adapters you will need to connect the flash drive to your MacBook (USB-C to USB 3)
Something to copy the flash image to the USB drive. I use balenaEtcher.
USB Wi-Fi adapter, just in case you have to reload the Wi-Fi driver.
Here is where you need to decide: do you want this device to be able to dual boot between Linux and macOS? I suggest this option for a couple of reasons:
Depending on the model of the MacBook, we will need to copy some software like the Wi-Fi driver over from macOS to Ubuntu.
It might make debugging the transition easier
It makes it easier to set up with AppleCare
I also strongly suggest you back up your Mac with TimeMachine or Carbon Copy Cloner. The Linux install process shouldn’t destroy your Mac files, but these things happen.
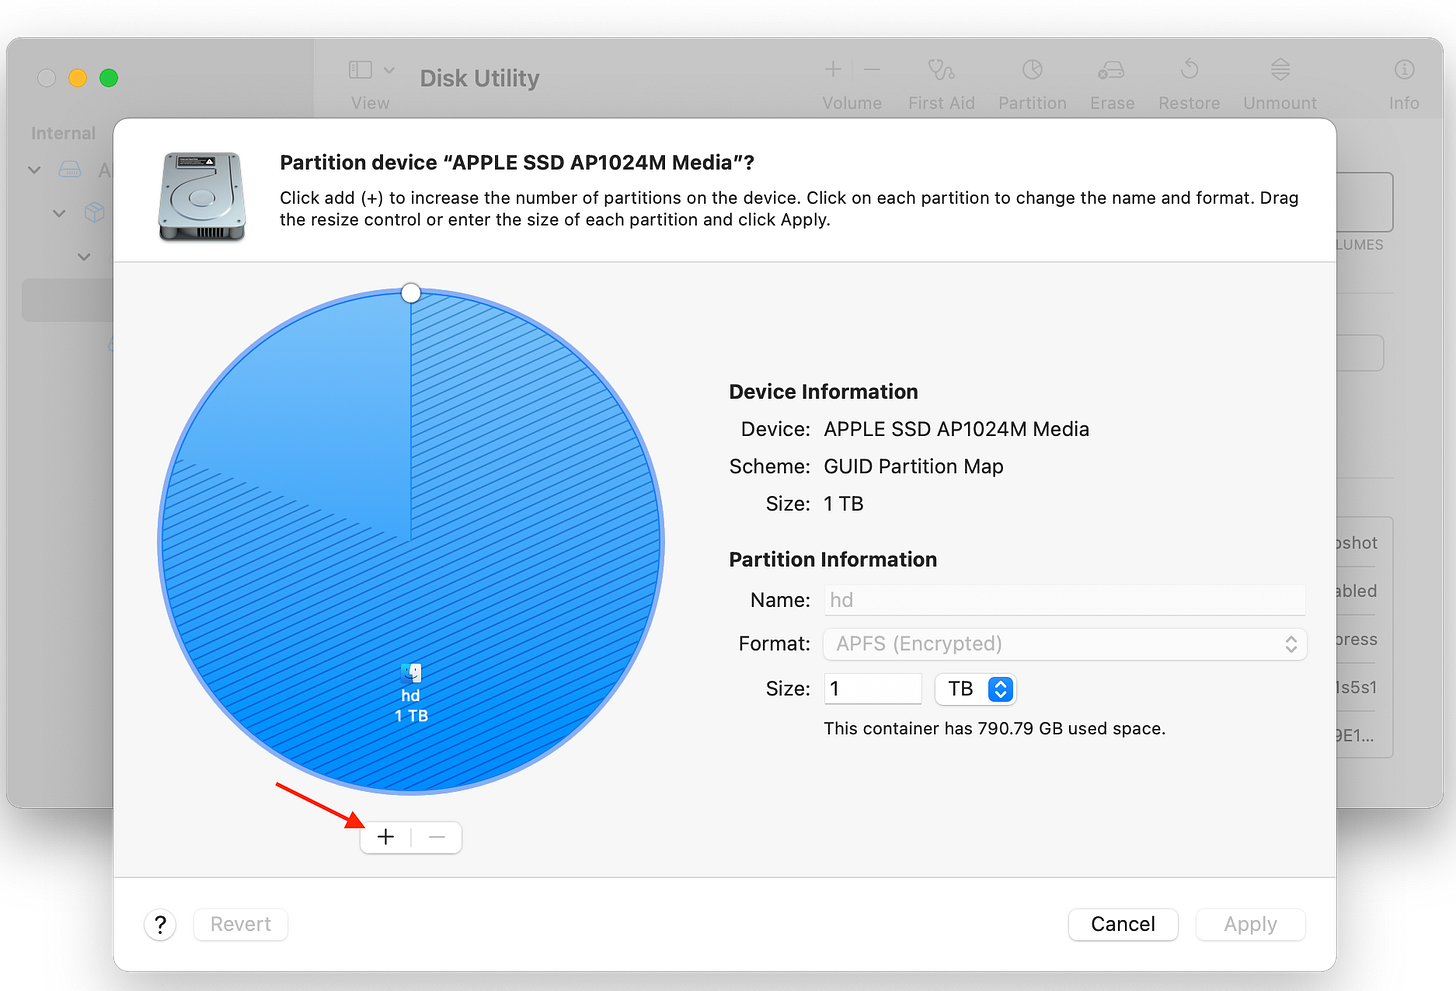
That said, the first thing we will need to do is to create the proper disk partitions on the hard drive. You will need at least three partitions: one for macOS, one for Linux, and another for Linux swap space. This is pretty easy, but you must pay attention to details.
Open Disk Utility from the Utilities folder in your Applications Folder
Choose the volume you want to partition for Linux
Press the “Partition” button on the top-right.
Under the blue pie chart, press the “+” button.
When prompted, select “Add Partition” and NOT “Volume.”
Name: choose a name for the partition, e.g. Linux
Format: choose whatever format you want - it doesn’t matter. The Linux installation process will erase your created partition.
Size: pick the desired amount of space for Linux. You will not be able to change it after the installation.
Repeat the steps above to create another partition. Name this partition something like Linux Swap and set the format to MS-DOS (FAT) again. How big should this be? For Ubuntu, it should be at least the size of RAM. I suggest doubling it. (so for an 8GB system, make it 16GB).
So far, so good; now that we have set aside some space for our Linux install, we need to create an install disk. How we do this depends on which Mac we have.
My mission is to protect you.
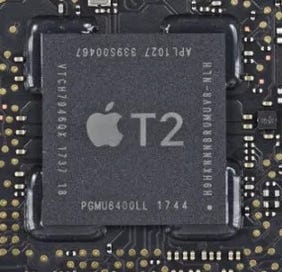
In 2017, Apple introduced the T2 chip into a MacBook Pro line and several other models. One of the features of this chip is to provide the Security Enclave Processor. It manages encryption keys for things like TouchID and FileVault and “other tasks.” I applaud Apple for its hardware security efforts; the Secure Enclave part of the T2 chip is pretty cool, even if security researchers were able to break it eventually.
Linux developers faced some challenges with T2 as those “other tasks” that it performs also include the interface to the keyboard and trackpad. Additionally, there is some connection to the built-in camera.
Thankfully, the folks at the open-source “Linux on T2” project performed amazing reverse-engineering magic, and we now have a working system. If you end up using this code, please drop them some love.
Apple really didn’t want you to do this.
One of the first things you will discover if you use a Mac with a T2 chip is that you must disable the startup security. This is a relatively easy task.
Reboot the Mac and hold down the Command (⌘)-R until the Mac comes up into macOS Recovery mode.
You most likely will be promoted for the admin user password.
In the menu bar, select Utilities > Startup Security Utility.
You will have to unlock it again with the admin password.
Select Secure Boot - No Security
Select Allow Boot Media to Allow booting from external or removable media
I recommend reviewing the notes about disabling startup security from Apple support and the t2linux wiki.
Not yet! You want Wi-Fi, don’t you?
You should take a couple of other steps before creating an installation disk. From what I understand, the Wi-Fi firmware is certainly not open-source. Let’s start by reading the guide to getting Wi-Fi and Bluetooth working on T2 Macs. Here are the steps.
Boot into macOS
Download the
firmware.shscript from here.In Terminal, cd to the directory where the script is located
Change the script permissions and run it
$ cd ~/Downloads
$ chmod +x firmware.sh
$ ./firmware.sh
Detected macOS
Mounting the EFI partition
Password:
Volume EFI on disk0s1 mounted
Getting Wi-Fi and Bluetooth firmware
Copying this script to EFI
Unmounting the EFI partition
Volume EFI on disk0s1 unmounted
This will place a copy of your firmware in a place the Ubuntu system can pick later once you have completed the installation. All you need to do is run the same script over again. But since you won’t have a working Wi-Fi yet, I would advise you to put a copy of the script on another USB drive. Remember to format that drive to MS-DOS (FAT).
Let’s create an install disk.
This is also easy but requires an eye to attention. While you are still in macOS:
Download a copy of the
iso.shscript from T2-Ubuntu releases on GitHub.In Terminal, cd to the directory where the script is located
Change the script permissions and run it.
$ cd ~/Downloads
$ chmod +x iso.sh
$ ./iso.sh

Choose the flavour of Ubuntu you wish to install:

1. Ubuntu
2. Kubuntu

Type your choice (1 or 2) from the above list and press return.
1

Choose the version of Ubuntu you wish to install:

1. 22.04 LTS - Jammy Jellyfish
2. 23.04 - Lunar Lobstar

Type your choice (1 or 2) from the above list and press return.
2

Downloading Ubuntu 23.04 - Lunar Lobstar

Part 1
############################################################### 100.0%

Part 2
############################################################### 100.0%

Creating ISO

Verifying sha256 checksums

ISO saved to Downloads
This process takes a few minutes to download. You should now find a file in your Downloads folder named something like this:
That copy of balenaEtcher and your USB drive will come in handy here.
Drag and drop the
.isofile into the first button titled “Flash from File.Plug in your USB drive and select it from balenaEtcher.
Hit the Flash button
Once this is completed, you will now have a bootable Ubuntu installer.
Ubuntu Installation
You should follow these directions for Booting your Linux install USB.
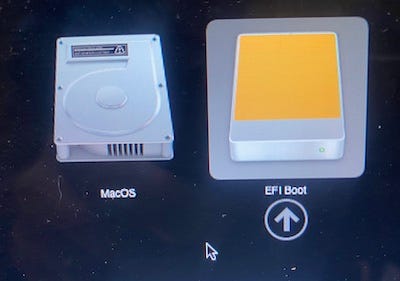
Reboot while holding down the option (⌥) key; this will put you in the macOS Startup Manager.
Select the orange EFI option with arrow keys and press return/enter. If there are two, try the one to the right first (the last one).
The installation may start immediately, or you may be put into a Bootloader Menu where it may select a default option, e.g., “Try or Install Ubuntu.” Use the arrow keys to select a different option.
If you get a message about” software update is required …” while trying to boot, you probably forgot to disable secure boot. See the instructions above.
Answer the questions about which language and keyboard you prefer.
When you get to the Updates and Other Software page, Choose Normal Installation and select the option to Install third-party software.
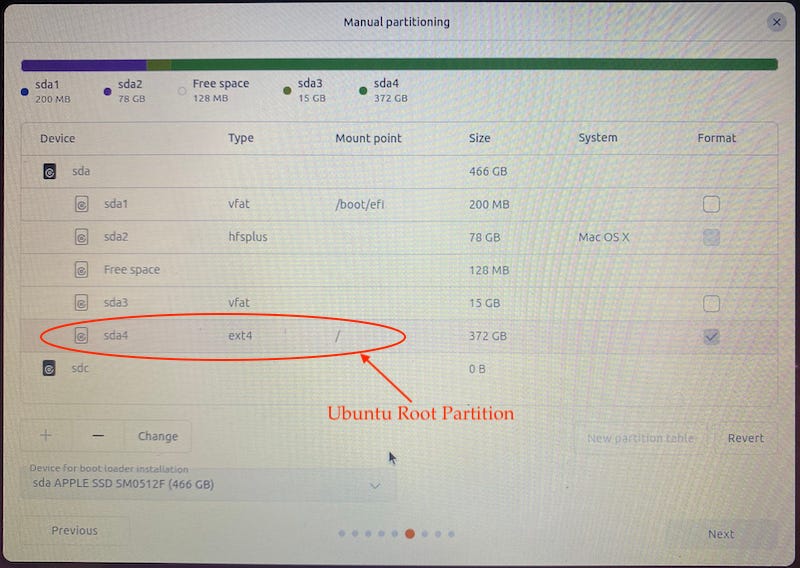
When you reach the Installation Type screen, select the option Something else. This will allow you to choose which partitions to use for Linux and the swap file. your screen
Your screen won’t look exactly like this, but it will give you an idea of the setup. You can double-click on the partitions and select which is used for swap (fat32) and which will be the ext4 used by Linux. I found some more instructions that might be helpful here.
I might be wrong about the need for a swap partition; this might have changed in Ubuntu 23.04. It;s possible you can skip thsi step and just do the partition of linux set at / (root)
Before clicking Install Now, double-check that you have selected the correct partitions. Confirm that you want to write changes to those disks by clicking Continue.
In the following screens, you can choose your time zone, create a user account, and wait for the installation to complete.
If all goes well, you’ll get a screen with lots of text that tells you to remove your installation media.
It’s Bootytime
Hopefully, it will boot into Ubuntu automatically. If it boots into macOS, you will have to reboot while holding down the option (⌥) key and select the Linux partition.
We are not entirely done yet. Earlier, I mentioned that you should create a USB disk with a copy of the firmware.sh script from here. Did you make one?
Insert the USB drive and copy the firmware.sh file to the Desktop. Open the default terminal app, set the permissions, and re-run the firmware script, this time from the Ubuntu side.
$ cd ~/Downloads
$ chmod +x firmware.sh
$ bash ./firmware.sh
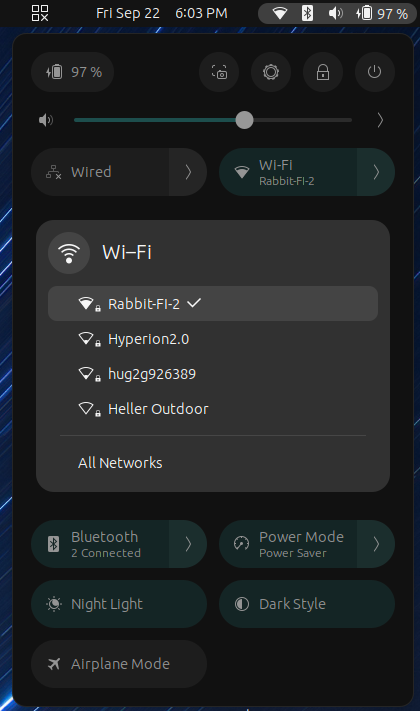
While it mentions here that you can copy the firmware from the command line, I found that the script worked every time. This should work without reboot. You should be able to set the Wi-Fi from the system menu.
Wi-Fi contingency plan
I have done this a few times and at least once had the Wi-Fi driver fail. So, take a few minutes to read about the Wi-Fi driver and how to force a re-install of the Broadcom driver.
This is why I suggested earlier having that USB Wi-Fi device on hand until you feel confident that your system is stable.
$ lspci -vnn | grep Network
e5:00.0 Network controller [0280]: Broadcom Inc. and subsidiaries BCM4364 802.11ac Wireless Network Adapter [14e4:4464] (rev 04)
	Subsystem: Apple Inc. BCM4364 802.11ac Wireless Network Adapter [106b:07bf]
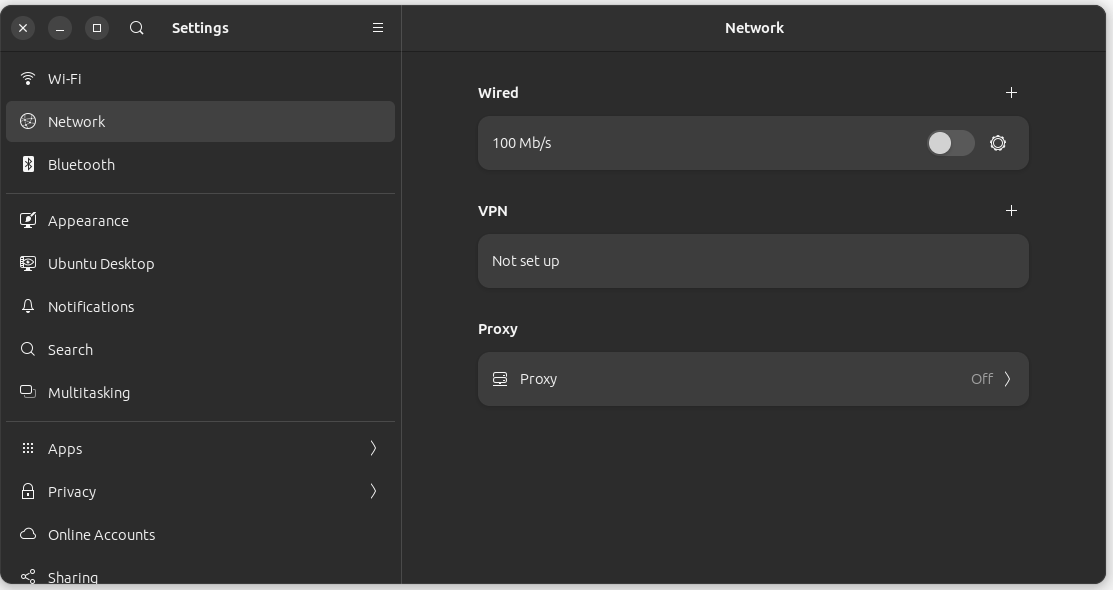
Initially, I also had some alerts complaining about Network connectivity. I was able to make them go away by going into the Settings application and shutting off Wired connections from the network panel.
Welcome to Linux land.
If you made it this far, congratulations are in order. You now have a Mac that can dual boot with Ubuntu or macOS. There is a slight learning curve. On the other hand, there are many videos and articles on the net about how to do almost anything with Linux.
I would start with the Ubuntu Desktop Guide and get a feel for all the built-in stuff before going hog wild with the customizations.
Next up - customizing your Ubuntu experience and transitioning from the Apple EcoSystem.


