
Parts that don't suck: part 3
Marine-grade electrical parts built to survive vibration, weather, and bad ideas.

In my previous articles I wrote about making good connections and power supply basics. That work matters on the farm because everything sits outside, gets wet, gets dirty, and keeps getting used long after the paint wears off.
But electrical systems really get put on trial in vehicles, especially off-road ones. Vibration and dirt work like a file, slowly chewing through copper and insulation until something goes bang or catches fire.
Given that I wasn’t done talking about reliable wiring, let’s continue my theme of adapting marine electrical parts for trucks and other low-voltage, high-current builds that need to survive corrosion and abuse.
Over the years I’ve done several frame-up off-road truck builds and a lot of rewiring, often with dual-battery setups so winches, radios, and camping gear could run without leaving me stranded in the woods. This time I want to share a few more marine-derived parts that have saved my ass more than once, in particular an automatic charging relay, some rugged circuit breakers, and last but not least, heat shrink.
Blue Sea ML-ACR
Dual-battery systems are common on off-road vehicles, especially trucks set up for camping and back country travel. These days people won’t go into the woods without wiring in winches, extra lighting, refrigerators, and inverters, not to mention a Starlink dish so they can post about being off-grid in real time. The trick is running all of that gear without killing your starting battery and getting stranded.
But this is where a lot of people get the wiring wrong. They hard-tie the batteries together, rely on a manual switch they forget to use, or install a cheap isolator that drops voltage and causes more problems than it solves. What you actually want is a system that automatically combines the batteries when there’s a charge source and isolates them when there isn’t, including during engine start.
Boats have the exact same problem, except the consequences are worse. When you kill the starting battery on the water, you can’t walk out for help. You end up drifting to Gilligan’s Island.
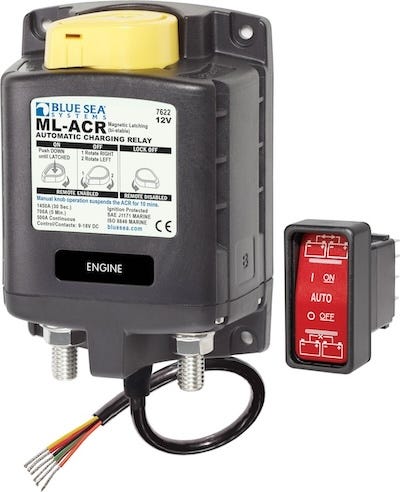
The marine world has been dealing with this exact problem for a long time, and one of their cleanest solutions is the Blue Sea Systems ML-ACR automatic charging relay. It combines the batteries when there’s a charging source and isolates them when there isn’t, with no voltage drop, no switches to forget, and nothing for the operator to screw up.
Being a marine part, it’s not cheap, but this is one of those cases where you actually get what you pay for.
I like the ML-ACR not just because it works, but because the design is genuinely ingenious. It’s a magnetic-latching relay, not some coil that sits there humming and cooking itself all day. Once it switches, it stays put and stops wasting power.
It just does the right thing on its own, no switch to remember and no ritual before you turn the key. But when you need to take control, it lets you. There’s manual control for the times you know better than the hardware, and a lock off mode that’s saved my ass more than once while I was elbows-deep in the rest of the electrical system.
There’s no voltage penalty and no fragile electronics in the current path. It can carry a boatload of current and survive a salty, corrosive environment.
It doesn’t take a PhD to wire it. The left stud goes to the house battery, meaning the auxiliary battery that runs your gear, and the right stud goes to the starting battery and the alternator.
There’s also a remote switch you can mount on the dash for manual control. It lets you force the ML-ACR ON, force it OFF, or leave it in AUTO, with indicator LEDs showing when the batteries are combined, without having to crawl back to the relay. Wiring the switch is simple: red is the control lead, yellow feeds the indicator LEDs, and black is ground. The rest of the wires in the harness are for edge cases and advanced setups, and most of the time you can ignore them.
Blue Sea has lots of instructions, wiring diagrams, and troubleshooting info on their site, plus real customer support if you get jammed.
Blue Sea 285 Circuit Breaker
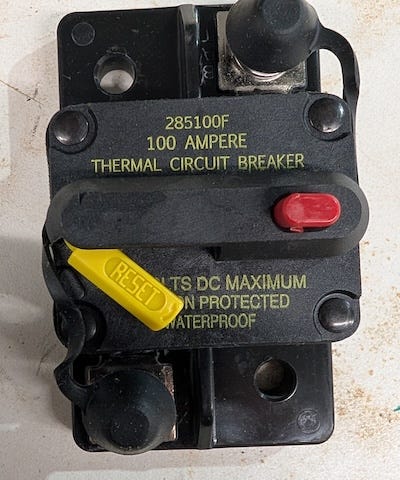
Next up is another part I stole straight from the marine world: the Blue Sea Systems 285 series circuit breaker. So what, it’s just a circuit breaker. That’s easy to say until one fails on you, or you realize you didn’t bring a spare fuse. This is one of those parts you install once and forget about, because it just friggen works.
It’s waterproof, won’t corrode itself to death, doesn’t false-trip, and it can double as a simple disconnect when you’re working on anything downstream. It’s also available in both panel-mount and surface-mount versions, which makes it easy to fit into different layouts.
Another thing I like is that it tells you when something actually went wrong. If a breaker trips, you know it. Big yellow bar. You’re not left chasing a dead circuit or guessing which fuse quietly gave up.
The reason I chose thermal breakers in vehicle wiring is simple: they make more sense than fuses. Fuses are fine on a bench or in a factory harness where they’re trying to save a buck. In my trucks, I can do better. When a fuse blows, you’re dead until you replace it, assuming you even have the right spare. If you don’t, you start playing MacGyver, and that’s when bad decisions get made.
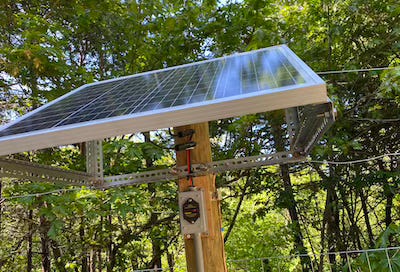
I’ve even used these breakers on solar panels, and they work just as well there, same low-voltage DC problem, same need for protection you can reset or isolate without digging for parts.
Adhesive Lined Heat Shrink Tubing
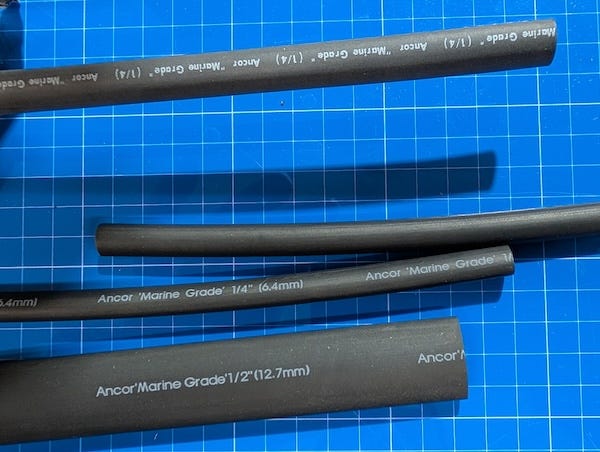
The last item in my ongoing romance with marine parts comes from Ancor, and it’s one of those things you don’t really appreciate until you go back and inspect your work a few years later.
Heat shrink is one of those things people treat like an afterthought, but I think it’s just as important as the thing it’s covering. The reason is simple: most wiring failures don’t start at the conductor, they start at the edge of the connection. That’s where moisture creeps in, vibration works things loose, and corrosion starts eating copper one strand at a time. Heat shrink doesn’t just make thing look tidy, it seals the joint, provide strain relief, and keeps the connection from flexing itself to death.
Most wiring failures don’t happen because the copper is bad. They happen because the wire keeps bending in the same place until it finally gives up. At a crimp or splice, the wire goes from stiff to flexible, and all the movement concentrates right at that transition. Vibration, temperature changes, and normal harness motion work that spot until the copper work-hardens and cracks, even while the insulation still looks fine.
This is why properly executed crimps are preferred over solder anywhere wiring is exposed to movement. When you solder stranded wire, the solder wicks up into the strands and turns a flexible conductor into a rigid section. The wire still moves, but now all the bending gets pushed to the first unsoldered spot, simply relocating the failure instead of fixing it.
The aircraft industry learned this a long time ago and wrote it into the standards. Specifications like MIL-T-23053 and SAE AS23053 define heat shrink not just as insulation, but as a mechanical strain-relief system. That’s why adhesive-lined heat shrink is used at terminations and splices. The adhesive bonds to the insulation past the crimp, stiffening the wire gradually, controlling where flex is allowed to occur, and preventing conductor fatigue at the rigid-to-flex transition. Plain heat shrink can’t do that. It shrinks, but it doesn’t support.
The other half of the job is environmental sealing. Corrosion isn’t mysterious, it’s basic chemistry. Copper exposed to oxygen and moisture forms copper oxides, and those oxides are poor conductors. Once that starts, resistance goes up at the joint. Higher resistance means localized heating under load, which accelerates oxidation even more. Add salt, dirt, or fertilizer residue and you’ve built a tiny electrochemical cell that eats copper for breakfast.
Adhesive-lined heat shrink shuts that whole process down by removing the reactants. When the adhesive melts and seals, it blocks oxygen, moisture, and contaminants from ever reaching the metal. No electrolyte, no oxidation, no slow-motion failure. This isn’t about making wiring look nice. It’s about stopping the chemistry before it starts.
The last piece is workmanship. It’s not just about looks, it’s a signal. It tells you someone understands the science behind strain relief, corrosion, and why wiring fails over time, and that they actually give a damn about what they’re building. Poor workmanship often isn’t just cosmetic. It’s a reliable predictor that something is going to fail, usually at the worst possible time.
Now comes the part everyone thinks they already know, and where most people still screw it up: actually applying heat shrink correctly.
Use a heat gun.
Not a lighter, not a torch, flamethrower or whatever happens to be nearby (you know who you are). Open flames overheat one side, scorch insulation, and boil the adhesive before it has a chance to flow. A heat gun gives you even, controlled heat, which is exactly what adhesive-lined heat shrink actually needs to work.
Start in the middle and work outward.
Heat the center of the tubing first, then move toward the ends. This pushes air and molten adhesive out instead of trapping it inside the joint. If you heat the ends first, you’re likely to trap air or adhesive, which shows up later as blisters or bubbles that never really seal.
Watch for adhesive flow.
You want to see a small, even bead of adhesive appear at both ends of the tubing. That bead is proof that the seal formed. No bead usually means no seal.
Keep the heat moving.
Don’t park the gun in one spot. Steady, even heat lets the tubing recover without blistering or burning. If it bubbles, scorches, or smells bad, you’ve overcooked it.
Think strain relief, not just coverage.
The tubing should extend onto the wire insulation far enough to support it and move the flex point away from the crimp or splice. Covering the joint alone misses the point.
Let it cool before touching it.
Don’t tug, flex, or move the wire while it’s hot. Let the adhesive set as it cools so the joint locks in mechanically.
Done right, adhesive-lined heat shrink becomes part of the connection. Done wrong, it’s just melted plastic that smells bad.
Like anything else, your choice of tools often limits how good a job you can actually do. Cheap heat guns tend to run either too cold or way too hot, with nothing in between. I’ve burned through enough of them to know they’re fine for stripping paint, but not much else. When you’re working with adhesive-lined heat shrink, brute force isn’t the goal. Control is.
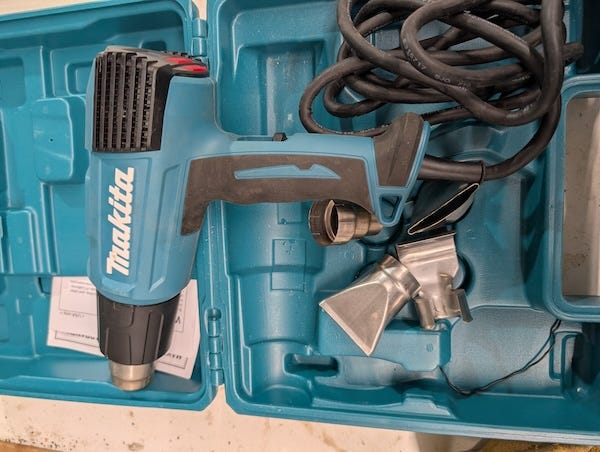
I eventually landed on the Makita HG6530VK, and it stuck. It gives me real control over both airflow and heat. The variable temperature lets me shrink tubing evenly and get the adhesive to flow without scorching insulation or boiling the liner. It also comes with several attachments, including a curved nozzle specifically designed for heat shrink. For me, the digital display isn’t a gimmick, it lets me repeat the same results every time instead of guessing.
Do it right. Walking home sucks.
None of this is exotic or clever. It’s just choosing parts that were designed for environments where failure isn’t an option and using them correctly. Boats, trucks, and farm equipment all fight the same enemies: vibration, moisture, corrosion, and time. Do this right and the electrical system disappears into the background, which is exactly where it belongs. When you’re cold, tired, and miles from pavement, the best wiring is the kind you don’t have to think about.
As I say in each of these pieces, there are no sponsorships here. Don’t ask for one. No affiliate links. No favors. I’m pretty sure most of these companies have never heard of me, and that’s fine. I’m writing about these parts because they earned their place in my shop by working, not because anyone asked or paid for it.
If you like building things and want to know why certain parts get chosen and what actually survives outside a lab, you’ll probably like the rest of what I write. Sharing it helps real people find the work. The algorithm can do whatever it wants.
https://youtu.be/SHhF97dg1XA?si=OYGDmSMSyKyZs_Es