The Guest House
Southern Hospitality
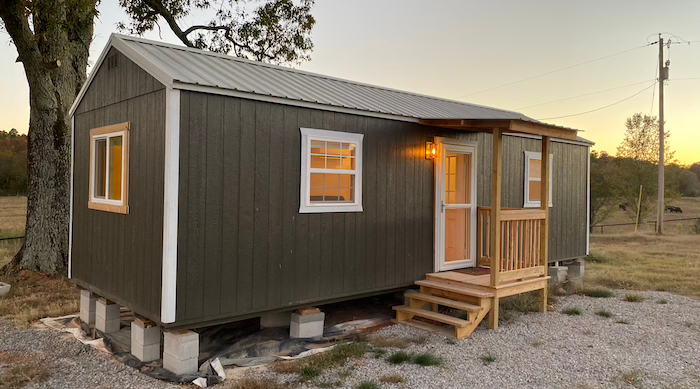
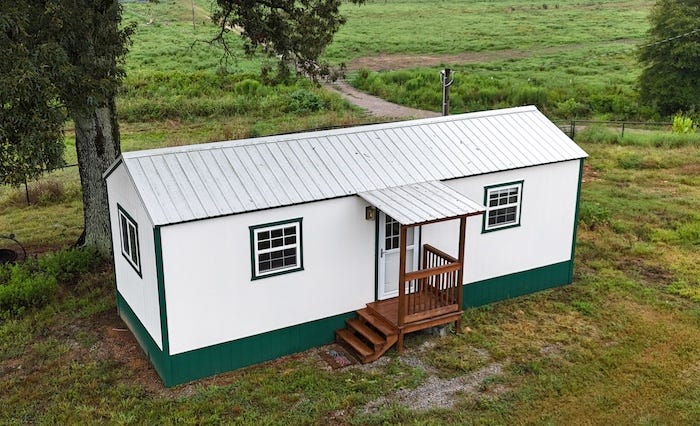
As we settled into our new home, we quickly realized we needed a place for guests and visitors. My goal was to not only give visitors some privacy but also not have them bothered by our dog(s) who patrol the property. At first, I considered converting one of the shipping containers into a tiny house. The Container Guy on YouTube has a lot of great videos on how to do this properly. However, after pricing out all the options, I came up with a better idea. I found a repossessed 12 x 32 foot Frontier Shed for a great price.
Even though the unit was bare, it already had four windows and a door installed, which put it ahead of combining two containers and adding windows and doors.
Preparing the site.
Even though I was outside the city limits and had a lot of flexibility regarding what I could do, I still wanted to make the guest house up to code, including running water, sewage, and electricity.
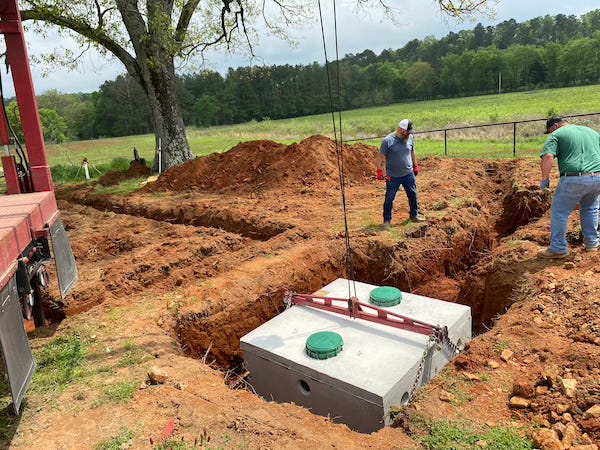
After we scoped out a suitable location for the guest house, our next step was to install a proper septic system. (Learn how this works) We excavated a trench to support the septic tank and drain field.
We chose a locally fabricated concrete tank, and their team showed up with a crane truck and did a fantastic job of getting it in place. We ran the drain pipes and inlet pipes. We set up the inlet with a cleanout under where the house will be located. I was also able to tap into the fresh water line from the well, and then trenched a hard line to provide water to the guest house. Before I buried the tank, I added tall septic tank access risers so I could easily find them if I ever had to pump the tank.
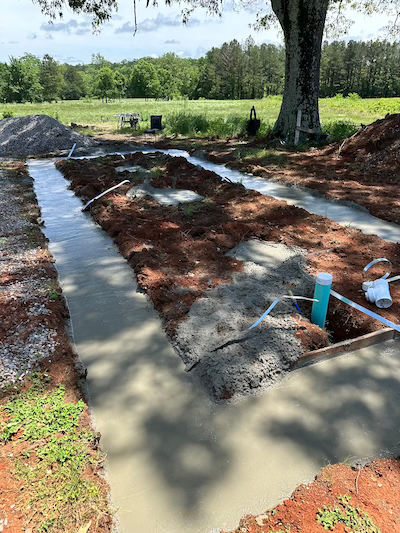
The next job was to set a concrete foundation for the house. Since we are in tornado country, we embedded a few tie-down straps in the concrete that we could attach to the house. Before pouring the concrete, I fabricated a tunnel through which the septic and well water lines could run.
Pouring the foundation went off without a hitch, and after the concrete cured, we were ready to take delivery of the house.
Home Delivery
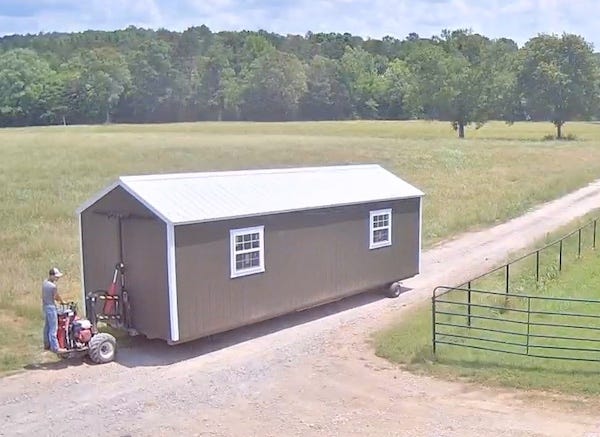
I found this part amazing. While the house was transported on a flatbed, it was installed by one guy using a mule forklift.
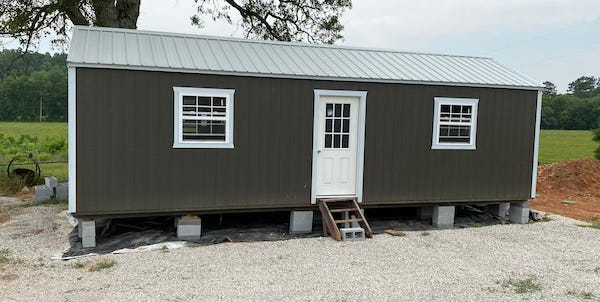
The house was placed and leveled on a series of concrete blocks on the foundation. I managed to find a set of steps lying around the ranch, most likely from the previous owner’s RV, to use as a temporary entrance. So I didn’t have to make one right away.
I Got the Power
The next item on my list was to install electrical power. Since there would be a lot of interior construction coming up, it was certainly handy to have outlets and lighting available. Incidentally, as a young boy, my father taught me the electrical trade, so even to this day, I find the work enjoyable.
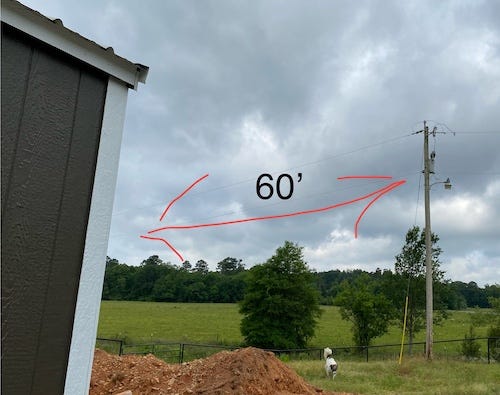
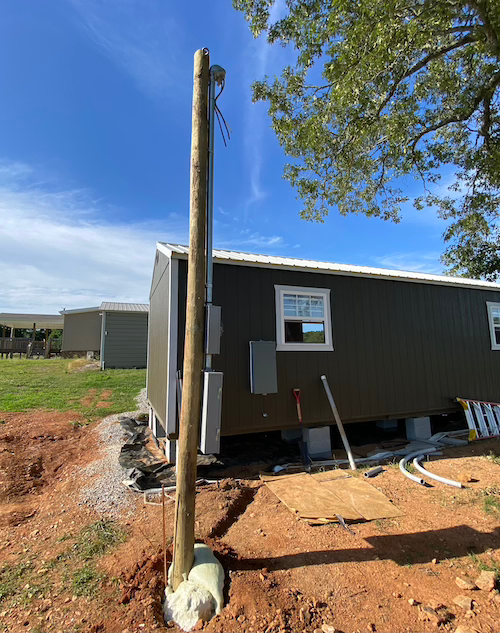
As I had planned, there was a power pole within the distance the local utility company required. After consulting with their engineer, it was determined that my guest house was considered a temporary structure, and they would not allow the service to be connected directly. Rather, it required its own utility pole. Fine; I went shopping for materials and discovered that the local lumber yard had pre-made utility poles with a meter, disconnect, and grounding available. The best part was they were more than happy to deliver it to my location!
One of my neighbors, a mechanical genius if I ever met one, kindly volunteered to drill me a hole with his customized auger setup. Did I mention how wonderful the folks are down here in rural Arkansas? It was a good thing, too; the ground had enough slate that it would have a gargantuan task to dig it by hand.
Once we had dug the hole deep enough, we lifted it into place with the tractor, set it plumb vertically, and then filled the hole with Sika PostFix polyurethane resin and stood back while it expanded! (Did I mention you really should read instructions first? This stuff is no joke.)
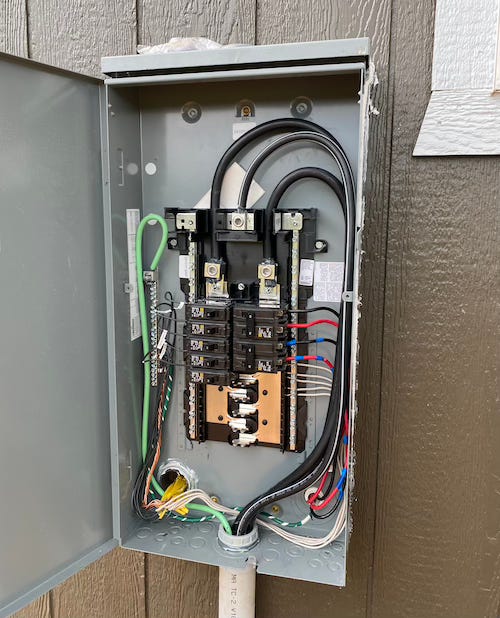
Once the pole was in place, I ran the service lines to a panel on the side of the house and started wiring the circuits. I selected a 200A panel because I planned to install an electric tankless water heater.
You are in Hot Water, Now.
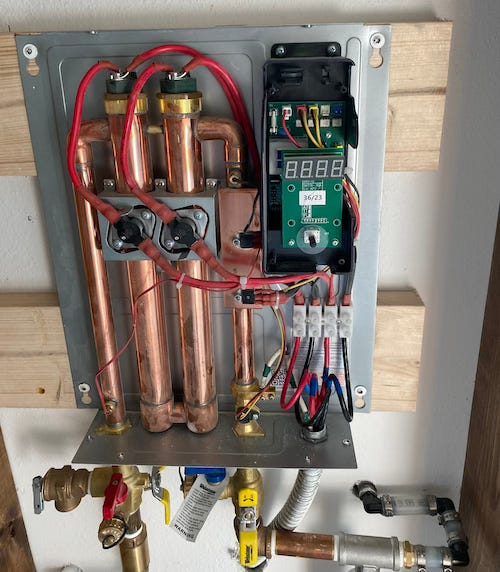
Since I planned to put a shower, bathroom, and kitchen sink in the guest house, I needed a way to heat the domestic water. Rather than install another propane tank, I opted to use an electric tankless heater. I ran into an excellent plumber who turned me on to the Eemax EEM24018.
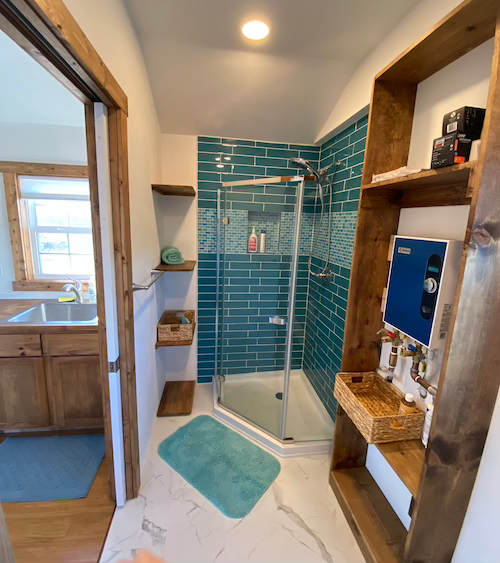
The EEM24018 is a modern computer-controlled water heater. It was easy to install, nicely built, and stylish enough that I didn’t need to build a cabinet around it. However, it required me to use two pairs of 40 A breakers and run four #8 AWG wires and an additional ground from the panel.
I added a pair of shutoff and diversion valves so I could occasionally flush and clean the unit, as well as a 3M AP430SS inline scale reduction system. As an afterthought, I should have added shutoff valve before the filter so I don’t have to go under the house to shut off the water each time I change it. Sigh! Didn’t I say “work in progress”
Interior Construction
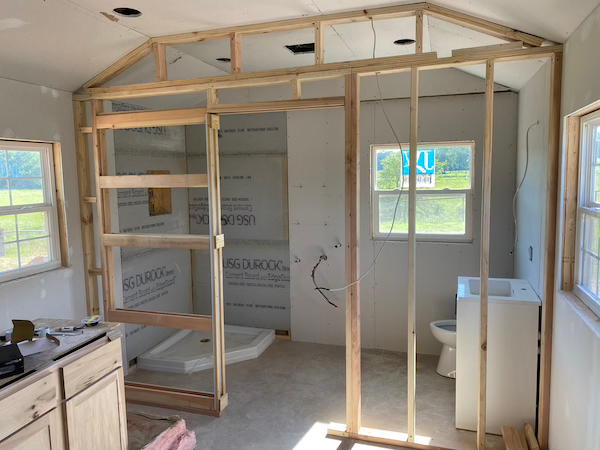
I was blessed to find an outstanding carpenter who was skilled and meticulous. He and his assistant insulated and sheet-rocked the interior of the guest house. He also cut in a bathroom and bedroom window and installed a partition to create a separate bathroom space.
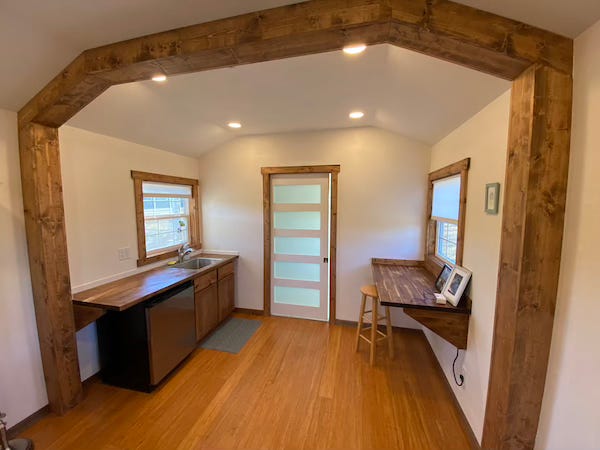
Given the space constraints, this design required a sliding door, and I even found the perfect frosted glass barn door at Lowes. We added a kitchen sink, refrigerator, and a built-in coffee/laptop table made from butcher-block countertop material.
I installed Juno recessed LED ceiling lights, which allowed me to switch the color temperatures to a pleasant, warm white light.
We installed bamboo flooring and a pair of faux wall and ceiling beams to finish rustic touches.
Creature comforts
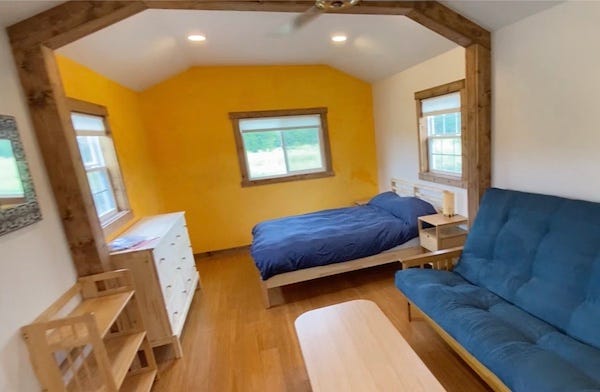
I experimented with color and found the exact shade of orange and yellow to complement the green outdoors. I also planned to use blue accents on the bed, comforter, and couch. I believe I was able to create an illusion of spaciousness that was balanced with an ambiance of comfort.
— Edit —
I forgot to add that I installed a small stand-up shower and water closet. Rather than use the plastic shower box, I used a combination of two different tile patterns.
—
Cordless cellular shades and some bits and some pieces of furniture finished up the interior.
I chose the Samsung SEER windfree series mini-split for HVAC, and I also installed a Craftmade VE58BNK3 ceiling fan for those warmer days. Over the years, I have had a lot of luck with this fan. I run them 24/7 during the summer months and find them both reliable and quiet.
A Welcoming Entryway
I finally managed to break the rotted-through temporary stairway, which was replaced with a really nice covered deck that the carpenter fabricated. I also installed a storm door and an attractive wall sconce light fixture to greet guests at night.
The 80% rule.
To quote the engineering genius of SuperFastMatt, “The 80/20 rule is recursive, and that’s why you can never reach completion.” (Seriously, watch the first 30 seconds of the linked video, and you’ll understand.)
I still need to add metal skirting around the base of the house, with an access door for the septic cleanout and water shutoff value. As a finishing touch, I would also like to find a nicer front door with a stained glass window, hopefully recycled from an old southern home.
Y’all invited back next week to this locality
To have a heaping helping of their hospitality
Hillbilly that is. Set a spell; take your shoes off.
Y'all come back now, y'hear?Earl Scruggs – The Ballad Of Jed Clampett
Addendum:
We painted the house and put a skirt under it. The skirt helps to keep the pipes from freezing from the cold winter winds and discourages the field mice.





Cordless cellular shades were amazing!!! Tile in the shower- gorgeous. Very bright and very spacious and honestly, the comforter was heavenly too. Great job!!! Well done. I could feel the love that was put into every step.
Another great post. Keep ‘em coming…