I updated a number of things both thanks to feedback from some great people. A special Hat tip to Rodney Thayer for reminding me about using ed25519 keys for ssh.
Here are some notes on how I have been setting up my Raspberry Pies for development. Your milage may vary and I would love some feedback about better ways to proceed.
Initial OS Setup
SDCard
I have been using the best SanDisk Micro SD cards I can find. Currently the SanDisk Ultra microSDHC UHS-I Memory Card work well and I haven’t had any failures yet. Truthfully I wish there was a better alternative to the SD card, but its what we have today.
Imager
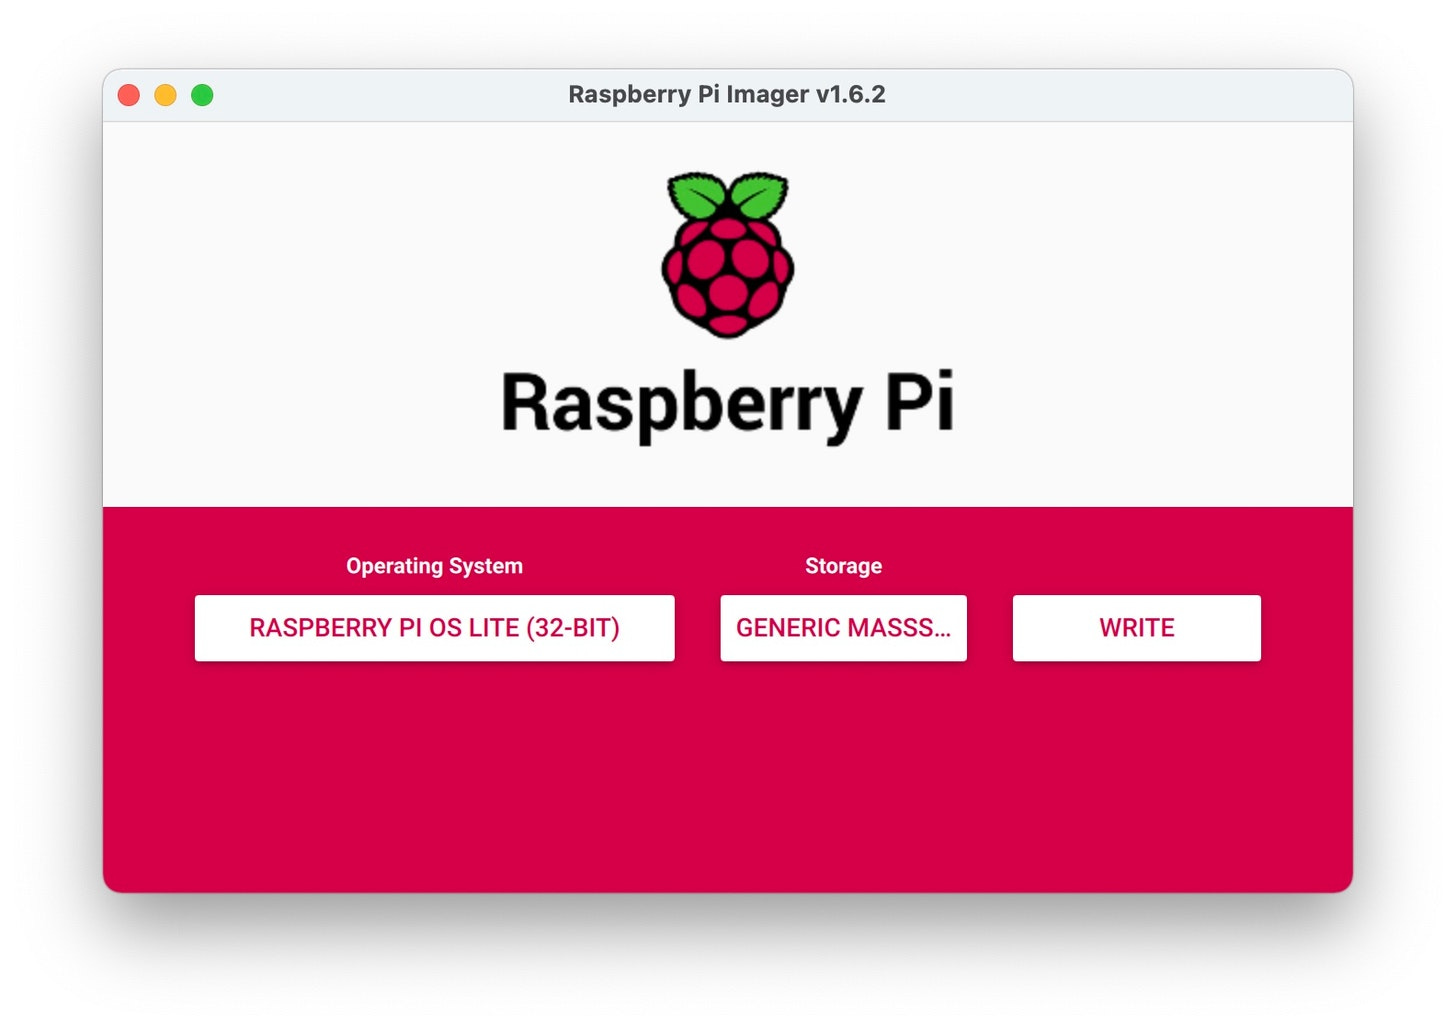
Depending on what I am building, I use the standard Raspberry Pi Imager on MacOS. I am also a fan of balenaEtcher especially when I am building something a bit more custom. Both are great but the standard imager should be sufficient for most folks.
SD Card Reader
I picked up a uni USB C to Micro SD Memory Card Reader Adapter a while back and have had zero problems with it.
Raspberry Pi OS
Most of my projects have been headless, and I have been able to use the standard Raspberry Pi OS Lite (Debian Bullseye with no desktop).
Another alternative is 64-bit Gentoo Lite. It takes a bit more hacking but I would argue it’s performance is not bad at all.
For embedded projects such as automotive systems, you might also consider doing a buildroot once you have completed your development.
Raspberry Pi Setup.
Once I create a SD card with the proper image, I will eject it and remount it. Since I am using macOS, I launch the Terminal app and create a ssh file on the SD card root. This will allow me to ssh to the device later.
% cd /Volumes/boot
#create a empty ssh file
% touch ssh
If you plan to connect using Wifi you need to also create a wpa_supplicant.conf on the boot disk that looks like the following. I happen to use BBEdit because it doesn’t suck.
country=us
update_config=1
ctrl_interface=/var/run/wpa_supplicant

network={
 scan_ssid=1
 ssid="YOUR NETWORK SSID"
 psk="YOUR NETWORK PASSWORD"
}
Then unmount the SD card
#cause the Terminal app to let go of the boot directory
% cd
#unmount the SD card
% diskutil unmount /Volumes/boot
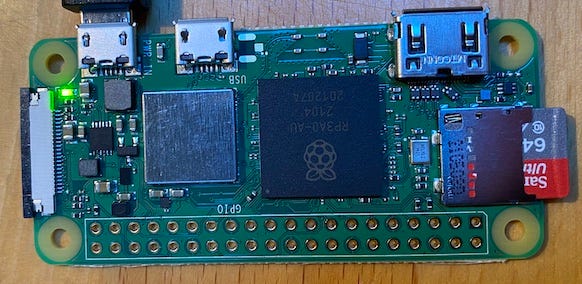
You can the insert the SD card into the Raspberry Pi and power it up. For the following examples I am going to run on the Raspberry Pi Zero 2 W which I picked up for about $15.00, and maybe a power supply for $8.00. Amazingly this is a fully functional Linux system with Wifi, Bluetooth, HDMI, USB as well as GPIO pins on a 2 ½” x 1 ¼” form factor.
With some luck it will show up on your network as raspberrypi and you should be able to ssh into the default account. Ignore the ssh noise about the authenticity of host, just say yes. Note If you have done this a few times, don’t be surprised if you need to edit your .ssh/known_hosts file and remove the line for the host named raspberrypi.
% ssh pi@raspberrypi

The authenticity of host 'raspberrypi (10.10.0.48)' can't be established.
ECDSA key fingerprint is SHA256:o4XOkKQjK8AMLd298g70dsMQHES91lXNqZI3e0TU9jM.
Are you sure you want to continue connecting (yes/no/[fingerprint])? yes
Warning: Permanently added 'raspberrypi,10.10.0.48' (ECDSA) to the list of known hosts.

pi@raspberrypi's password: raspberry

# lots of noise here about SSH and the default password
At this point you have a Raspberry Pi up and on your network.
User Setup
The next thing I usually do is create myself an account with all the privileges I need.
#create myself a user,
# it will prompt you for all sorts of stuff
$sudo adduser <your username>
# I usually ignore all the user information questions

#add the user to sudo
sudo adduser <your username> sudo

#add the new user to the all the appropriate groups
sudo usermod -G pi,adm,dialout,cdrom,sudo,audio,video,plugdev,games,users,input,netdev,gpio,i2c,spi <your username>

#logout
$ logout
Connection to raspberrypi closed.
Now login as the new user
ssh <your username>@raspberrypi
#it will prompt you for your password
The next thing I will do is to enable logging in with my ssh key. If you don’t already have an ssh public key your host systems .ssh directory, look up how to do that. Get a copy of the public key and set it aside, you will copy it to the raspberrypi next. Since my initial post I have updated my RSA key to the more modern ECC Ed25519 keys. There are lots of reasons related to the mathematical properties of the keys, but I also trust the Curve25519 a bit more than RSA these days.
$mkdir ~/.ssh
$chmod 700 ~/.ssh

$cat >  ~/.ssh/id_ed25519.pub
#paste in the contents of your id_ed25519.pub file
^C

#copy that key to authorized_keys
mv ~/.ssh/id_ed25519.pub ~/.ssh/authorized_keys

#if this worked , logout and re-login
$ logout

$ssh <your username>@raspberrypi
#this time it will not ask you for your password
For my own convenience I prefer to has sudo not ask me for a password. Thee proper way to do this is to use the visudo command. Take a second and read the documentation here.
$sudo visudo /etc/sudoers.d/010_<your username>-nopasswd

#add this line into the editor  and save file
<your username> ALL=(ALL) NOPASSWD: ALL
^X
you should now be able to run sudo without being prompted for password.
Remove the default user
The next thing to consider is to remove the default pi user. Most likely you will have to remove it from auto-login first.
$sudo raspi-config
#select System Options → Boot / Auto Login → Desktop Autologin
#disable the automatic login feature.

#once you get back to the main prompt -
# you can remove it from the system

$sudo deluser --remove-home pi
Change the hostname
Since I run a number of various systems, I find it useful to rename the device from it’s default hostname of raspberrypi. You need to update it in two places:
/etc/hostname - the name of the machine known to applications that run locally.
/etc/hosts - a hostnames to IP addresses locally.
The hostname should be composed of up to 64 7-bit ASCII lower-case alphanumeric characters or hyphens forming a valid DNS domain name.
$sudo nano /etc/hostname
#change the raspberrypi name to something as per hostname

$sudo nano /etc/hosts
#change the 127.0.1.1 entry tothe same name /etc/hostname

# reboot to cause the network to update.
$sudo reboot
The next time you ssh you will need to use the new hostname. It is possible that ssh will complain that the mapping of keys to address has changed. In which case you need to update the .ssh/known_hosts file on your system.
%ssh <your username>@<hostname>Updates and upgrades
The next thing I usually do is to ensure that I have the latest software packages running. First I want to update and download the list of available package information from all of the configured sources. Especially any security updates.
$sudo apt updateOnce it has obtained the latest package list, I force the upgrade.
#this can take a while - get coffee
$sudo apt-get upgrade
Usually a reboot is necessary only when the kernel is upgraded during this process. For example if see one the packages was named raspberrypi-kernel. I tend to do it the after the first upgrade anyhow.
Development Environment
LLVM Toolchain
I am a fan of the LLVM Compiler Infrastructure and have been using the Clang front-end. This allows me to use the same C++ compiler on the Rpi that I use on macOS.
Installation is fairly easy, I have been using the version 12.0.1 release from the LLVM Download. I haven’t yet tried version 13. I do the following:
#download a copy of the tar file
$wget https://github.com/llvm/llvm-project/releases/download/llvmorg-12.0.1/clang+llvm-12.0.1-armv7a-linux-gnueabihf.tar.xz

#unpack the file into a directory. - this takes a few minutes.
$tar -xvf clang*.tar.xz

#remove the tar file
rm *.tar.xz

#rename the directory to something more reasonable
$mv clang+llvm-12.0.1-armv7a-linux-gnueabihf/ clang_12.0.1

#move it to /usr/local
sudo mv clang_12.0.1 /usr/local

export PATH=/usr/local/clang_12.0.1/bin:$PATH
export LD_LIBRARY_PATH=/usr/local/clang_12.0.1/lib:$LD_LIBRARY_PATH

#test the install
clang++ --version
You should also add the two paths to your .bashrc file to make them permanent
Install Cmake
I have been using the Cmake system to generate the build files in my projects. Here are some simple instructions for installing CMake on Raspberry Pi.
#install cmake
$sudo apt install -y cmake

#check the version
$cmake --version
Test it out
Lets create a helloworld example. Create a file main.c
#include <stdio.h>

int main() {
    printf("Hello world\n");

    return 0;
}
Create a CMakeLists.txt file with some redirects for Clang
cmake_minimum_required(VERSION 3.0)
SET (CMAKE_C_COMPILER             "/usr/local/clang_12.0.1/bin/clang")
SET (CMAKE_C_FLAGS                "-Wall -std=c99")
SET (CMAKE_C_FLAGS_DEBUG          "-g")
SET (CMAKE_C_FLAGS_MINSIZEREL     "-Os -DNDEBUG")
SET (CMAKE_C_FLAGS_RELEASE        "-O4 -DNDEBUG")
SET (CMAKE_C_FLAGS_RELWITHDEBINFO "-O2 -g")

SET (CMAKE_CXX_COMPILER             "/usr/local/clang_12.0.1/bin/clang++")
SET (CMAKE_CXX_FLAGS                "-Wall")
SET (CMAKE_CXX_FLAGS_DEBUG          "-g")
SET (CMAKE_CXX_FLAGS_MINSIZEREL     "-Os -DNDEBUG")
SET (CMAKE_CXX_FLAGS_RELEASE        "-O4 -DNDEBUG")
SET (CMAKE_CXX_FLAGS_RELWITHDEBINFO "-O2 -g")

SET (CMAKE_AR      "/usr/local/clang_12.0.1/bin/llvm-ar")
SET (CMAKE_LINKER  "/usr/local/clang_12.0.1/bin/llvm-ld")
SET (CMAKE_NM      "/usr/local/clang_12.0.1/bin/llvm-nm")
SET (CMAKE_OBJDUMP "/usr/local/clang_12.0.1/bin/llvm-objdump")
SET (CMAKE_RANLIB  "/usr/local/clang_12.0.1/bin/llvm-ranlib")

project(hello C)

add_executable(hello main.c)
build the project
#use Cmake to create a Makefile
$cmake .

#build the project
$make

#run the test
./hello
At this point you have a raspberrypi on your network building and running code.
Git - version control
As part of the development process, you will most likely need a version of the Git distributed version control system. Even if it’s installed it probably a good idea to update to the latest version
$sudo apt-get install git-coreThis will make it easier to pull down various pieces of open source you will use for development.
SQLite Database
I have been using the sqlite3 database in some of my projects. It’s fast and light, open source and has a fairly reasonable C API. It’s easy to learn how to use and there are lots of tutorials available.
The Raspberry Pi install is fairly easy
#install the sqlite3 database engine
$sudo apt-get install sqlite3

#install the development libraries
$sudo apt-get install libsqlite3-dev
Checking disk space
Once I am done setting up the device, I often check the disk space used on the /dev/root SD card.
$df -h
Filesystem      Size  Used Avail Use% Mounted on
/dev/root        59G  3.9G   53G   7% /
devtmpfs         86M     0   86M   0% /dev
tmpfs           214M     0  214M   0% /dev/shm
tmpfs            86M  616K   85M   1% /run
tmpfs           5.0M  4.0K  5.0M   1% /run/lock
/dev/mmcblk0p1  253M   50M  203M  20% /boot
tmpfs            43M     0   43M   0% /run/user/1001
And even with a full development system, we only used 3.9 G of the SD card.
A few more things.
There are a few more useful packages you might want. If you plan to communicate to any I2C devices or use the GPIO lines you will need to do a few more things.
Setup i2c
If you plan to use i2c devices you need to enable support within the kernel by running the config tool.
$sudo raspi-config
# Select Interface Options
# Select I2C
# select yes when it asks you "Would you like the ARM I2C interface to be enabled?"
#exit the raspi-config
I find it indispensable to have some i2c debugging tools installed.
$sudo apt-get install -y i2c-toolsThis allows me to run the i2cdetect, i2cget and i2cset tool.
I also found it useful to install the
Setup GPIO
One of the main features of the Raspberry Pi is the 40 pin header of GPIO (general-purpose input/output) available on the edge of the board. These pins can be used for PWM, SPI, I2C and Serial data. If you plan to use the GPIO you will need to install the proper tools and library.
$sudo apt-get install gpiod libgpiod-devThere are a number of tutorials on using the libgpiod tools. The more useful ones include
gpiodetect - List all GPIO chips present on the system.
gpioinfo - List all lines for the GPIO chips, their names, consumers, direction, active state and additional flags.
gpioget - Read values GPIO lines.
gpioset - Set values GPIO lines
I/O permissions.
When we created our new user, we added it to both the gpio and i2c groups. If you create another user to run your app, you will most likely need to ensure that they have the proper permissions.
sudo usermod -a -G gpio,i2c <username>The kernel headers.
Since some of the code I write will access the pi I/O directly I found it useful to have the kernel headers around. You might or might not need these depending you what you are doing.
$sudo apt install raspberrypi-kernel-headersSome success here.
And now you have a full fledged development system configure on that SD card. The last I checked it ate up about 4.2G including the kernel headers and the clang, cmake system.
PS Notes.
Wifi Drop Out
From time to time, I have noticed that wireless drop out.. I am not sure if this is a power supply issue or not. There a number of posts about it, floating on the net, but nothing I can quick prove yet. I suspect the issue is the the Wifi power management is the culprit. If you want to play with the power management this might help:
# read the current power saving mode
$ sudo iw wlan0 get power_save

#turn power saving mode off
sudo iw wlan0 set power_save off

#turn power saving mode on
sudo iw wlan0 set power_save on


https://linuxhandbook.com/ssh-disable-password-authentication/
in /etc/ssh/sshd_config
PasswordAuthentication no
I've been doing Bitcoin and Java development on Raspberry Pis.
I'd say the first rule of Raspberry Pi development is minimize the amount of development done on Raspberry Pi hardware. (It looks like you're doing this by using the same C++ compiler as you use on your Mac) In my case using Java and Docker help me keep things cross-platform so I can do most of my development on my Mac. I need to "up-my-game" in this area and learn how to use some even better tools for cross-platform development.
On the hardware side, I've built a fairly powerful Raspberry Pi using the following components:
* Raspberry Pi Compute Module 4 with 8 GB RAM
* WaveShare CM4-IO-BASE-B with M.2 interface for NVMe SSD https://www.waveshare.com/cm4-io-base-b.htm
* An M.2 SSD, I'm using this one: https://www.amazon.com/gp/product/B082MS2KBB/
Most of the CM4 carrier boards to not include USB 3, so be careful what you order if you want USB 3.
I've also had good luck with a standard Pi 4 and a USB3-attached SSD. I'm running two (MainNet and TestNet) Bitcoin Core full-nodes via Docker on one of those (1 TB SSD)
I would also recommend keeping an eye on Jeff Geerling's blog and/or videos as he does very thorough testing on various hardware/software configurations that can be helpful: https://www.jeffgeerling.com/blog
(The Turing Pi 2 looks interesting, I am considering ordering one of those.)