
Rural Internet
Getting connected to the world

One of my highest priority projects at our new home was connecting us to the Internet. I had previous success with Starlink in Oregon early on as a beta tester and certainly wasn’t going to rely on the government’s failed broadband initiative. Even before we moved from Oregon, I acquired a new Starlink Gen 3 dish/router from SpaceX and shipped it in the containers with all our belongings to Arkansas.
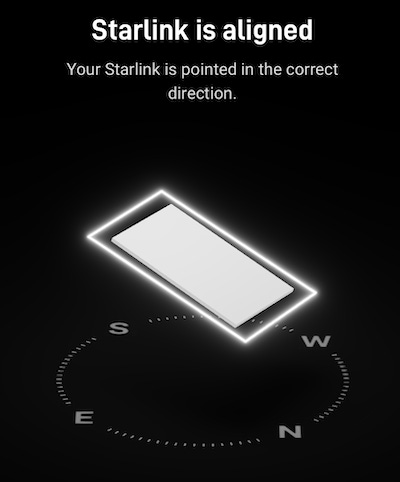
Installation was ridiculously easy. I found a suitable spot on our roof with a completely open view of the sky and used the Starlink Standard Pivot Mount Kit. I plugged it all together, and the antenna took a few minutes to boot up and get its bearings. The Starlink is an electronic phased array antenna, allowing it to communicate with the Starlink satellites without any physical movement.
The Starlink app made the alignment and setup process incredibly simple; it only took a few seconds.
As we were moving and setting up the home, I used the built-in Starlink router and Wi-Fi, but I had bigger plans down the road.
The Local Area Network.
While Starlink provides my connection to the Internet, I need a bit more functionality on our ranch than the built-in router can provide. We have a number of buildings, some guest accommodations, and some remote pieces of equipment that all need to be connected. I also want flexibility in managing network intrusion control and security.
I previously had a favorable experience with network equipment from Ubiquiti and the Unifi ecosystem. I am happy at how well they work together and how I can manage the system remotely.
The brains of our setup are the Dream Machine Pro (UDM-Pro). It has a vast feature set and many great videos available on how to set it up. The UDM-Pro can be used as a security firewall, router, professional surveillance camera system, VPN, and device manager.
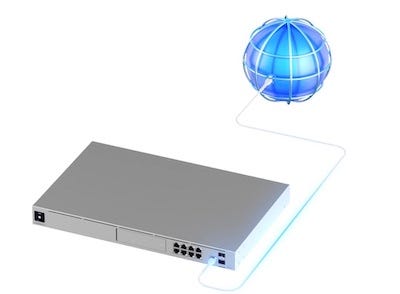
The UDM-Pro is a professional piece of hardware, and as soon as you open the box, you will realize that you are getting your money’s worth. Even the packing materials and mounting hardware are top-quality.
Before you run the setup wizard, I suggest you watch this video from Crosstalk Solutions.
If you plan to use it as a surveillance camera system, you must add a server-quality hard drive. An online calculator can help you size the drive based on how many cameras and how long you want to keep the videos around.
Wireless Devices
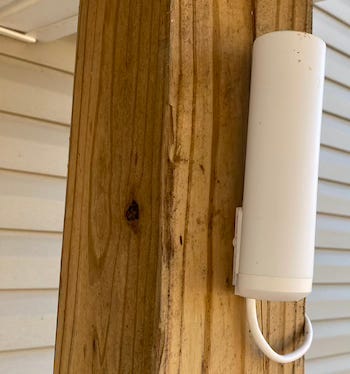
For Wi-Fi access points, I chose to stay within the Unifi ecosystem and installed a couple of U6-Mesh devices around the ranch. The U6-Mesh is perfect for outdoor networks, has a great antenna, and, in my experience, handles weather well.
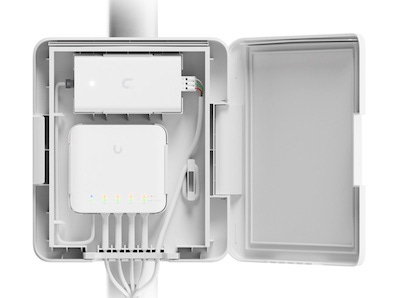
One of the other Ubiquiti products I really like is the USW-Flex-Utility outdoor weatherproof enclosure. Note that the enclosure is designed to hold a USW-Flex 4 port switch but doesn’t ship with one. It does, however, include mounting brackets and a 60W Power over Ethernet (PoE) adapter, and the box would be ideal for housing a Raspberry Pi or similar project,
Connecting the Outbuildings
I wanted to avoid trenching a ditch and running fiber to some of the more remote locations, like my front gate and shop. Instead, I connected them line-of-site using the Ubiquiti Building to Building Bridge (UBB). The UBB comes as a pair of pre-configured 60GHz radios with 5GHz backup. It can reach about 500 meters and is powered by PoE. While I found it easy to set up and align, this video can offer additional tips.
Video Surveillance
Since the property is large, I wanted to install a few cameras to monitor the main entrance and access road, as well as some of the wildlife near the crops. Back in Oregon, I experimented with several solutions, including a dedicated Mac Mini running SecuritySpy and a Linux box running ZoneMinder or Xeoma. None of them were great solutions, and some simply didn’t work. I wanted something better for our new home.
Then, I discovered what was sitting in front of me all along: the UniFi Protect network video recorder (NVR) that came with the UDM-Pro. Out of the box, UniFi Protect had all the features I was looking for and more:
Usability - It needed to be easy to set up and use.
Alerts and Detections — Use AI for what should be used for.
Scalable - The property was big enough that I expected to add more than ten cameras.
NO Subscriptions. — I own it, or I don’t use it.
Private — My camera data is mine. Screw you, Apple, Google, and the rest.
The only downside of UniFi Protect is that it requires using Unifi cameras. Although there are some hacks out there that allow the adoption of non-Unifi cameras,
The Gate Camera Project
Once I got the Internet working, my next project was to deliver it to the front gate. Not only did I want to set up a camera to watch the front gate, but I also wanted a guest access point available for the occasional RV guest we might host.
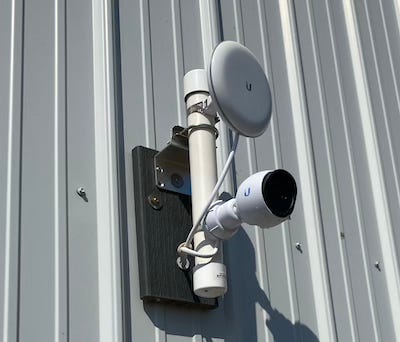
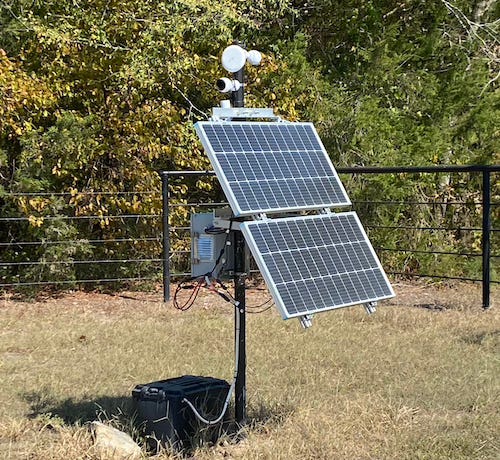
I decided to create a solar power station that could support a UBB, a U6-Mesh, and a pair of cameras.
Unlike a trail cam, which only needs power intermittently, the network camera and Wi-Fi access point consume power 24/7. That power needs to be supplied both on sunny and cloudy days. Even though we have a high percentage of sunny days in Arkansas, we still need a large enough battery to cover the darker ones.
When I started the project, there weren’t any great lithium-ion batteries that could handle the freezing temperature of winter, so I ended up using a Renogy 12v 200Ah deep cycle AGM battery. I chose to use a Renogy Rover 60 Amp MPPT Solar Charge Controller powered by a pair of 100 W solar panels to charge the battery.
Since all the network devices were powered by PoE, I did not need an AC inverter. Instead, I used the TP -DCDC -1248M, a DC-to-DC converter with an input range of 10-36 V DC and outputs PoE. If you decide to use one of these, be careful to use only the metal case (M) version; this is the only model that provides 48V passive PoE, which is needed for the Ubiquiti devices.
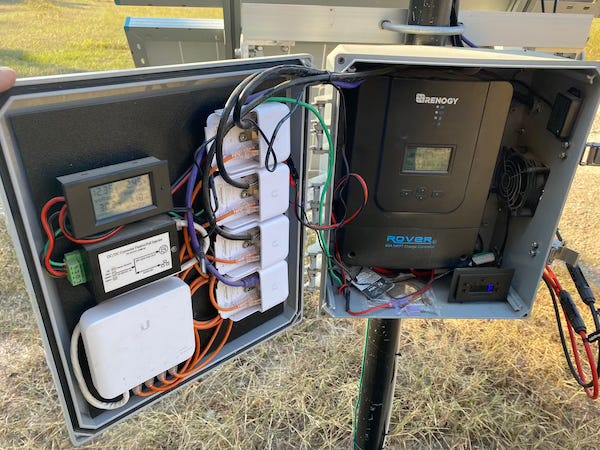
I mounted the charge controller, the DC-DC-converter, a USW-Flex (46W) PoE switch, and four Ethernet Surge Protectors (ETH-SP-G2) in a waterproof enclosure. The PoE switch routes data from a UBB that points to the main house and networks it to U6-Mesh and as a pair of cameras.
— edit. —
I forgot to mention that to assist in debugging I also added a multimeter to monitor current usage. Later as summer heat hit, I installed a fan and thermostat.
One of the nice things about the Renogy Rover is that is you can add a bluetooth module which allows you to monitor the status of the system without opening the box. Unfortunately, Renogy doesn’t have internet support for this.

—
All of this is mounted on a 2” galvanized steel pipe that I partially buried into the ground. In addition, I drove an 8’ ground rod connected to the surge protectors. I don’t want this equipment to go poof during any lightning storms.
In a previous article, I wrote extensively about lighting strikes, so I was curious how local people protect their structures from lightning strikes. Alas, I guess the concept of a Franklin Rod is lost these days.
Lessoned Learned and Work in Progress
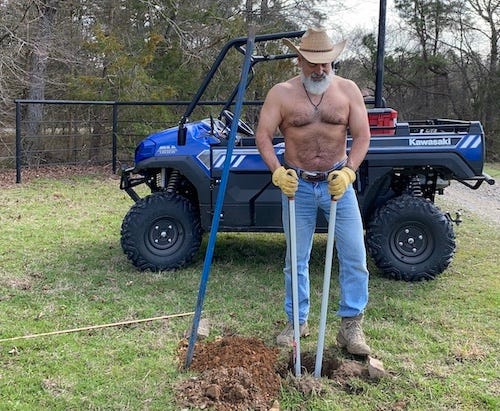
The next time I need to drive a post, I will employ the auger off of our tractor PTO. The ground by the gate was a mix of slate and hard dirt—lots of manual labor and breaker bar action. As a matter of fact, I will probably use a treated 4x4 post instead. I had to pour sand into the steel post to prevent it from vibrating. As I mentioned in my pumpkin patch article, I no longer use cement but rather fill the hole with Sika PostFix polyurethane resin.
I want to eventually replace the lead acid AGM battery with a modern lithium-ion unit to try and get longer coverage during cloudy days. I have had to recharge the battery with an external source more than once.
I ain't happy, I'm feeling glad
I got sunshine in a bag
I'm useless, but not for long
The future is coming on— Gorillaz
great site to caclulate the power capacity https://pvwatts.nrel.gov/pvwatts.php
Good notes on capacity calculations https://x.com/tahaalasemi/status/1855602812505256355?s=46