We Want The Airwaves
ADS-B Aircraft Tracking with a Raspberry Pi Revisited.
A few years back, I wrote about using a Raspberry Pi to pick up Automatic Dependent Surveillance-Broadcast (ADS-B) signals from aircraft passing overhead and sharing crowdsourced services with it.
Now that I have moved to Arkansas almost three years later, it’s time to update the project to a more modern system. Please re-read my old article if you don’t know what I am talking about. In addition to updating the hardware and software, I applied some lessons I learned from building automation on our farm.
My original system was based on a Raspberry Pi 3 or 4 and used a preconfigured image from ADSBexchange.com that booted from a MicroSD card. The system was housed indoors in my network cabinet and protected from environmental elements.
After doing some analysis using the tools at heywhatsthat.com, I determined that one of our farm’s outbuildings, the greenhouse and soon-to-be cooler/wash-pack station, was a perfect location for an ADS-B antenna. Fortunately, I had previously installed a hardwired internet connection to the greenhouse to manage the crop irrigation system. Since I used a USW-Flex PoE switch, it would be easy to access both power and our local network with a single Cat-5 cable.
Modern Hardware
My original Raspberry Pi was still usable, even though it had some mileage on it. I decided to save it for a class I might host later. Instead, for a few dollars more, I upgraded to the Raspberry Pi model 5. In addition to more processing power, the Pi 5 allowed me to avoid the MicroSD card and gave me better cooling options.
I added the official Raspberry Pi Active Cooler, which was very effective for the price. I know there are a few more cooling options available, but I wasn’t planning to mine Bitcoin with it; I just wanted to keep the Pi from failing during warmer months.
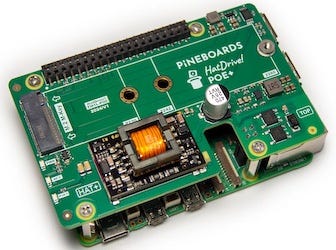
Instead of running a separate power supply, I chose to use a POE adapter, specifically the HatDrive! POE+ from pineboards.io. Their design employs an isolation transformer to derive power from Ethernet, which is essential for outdoor applications. The HatDrive! POE+ also has an M.2 M-Key connector for an NVMe card, eliminating the need to boot up from the MicroSD card.
I was able to assemble the core components for about $150.
Raspberry Pi 5, 4 GB RAM - $60.00
Raspberry Pi Active Cooler - $5.00
HatDrive! POE+ - $45.00
Patriot P300 M.2 PCIe Gen 3 x4 128GB - $46.00
ADS-B Receiver Hardware
As with my previous ADS-B receiver, I used a Nooelec NESDR SMArt v5 SDR for my software-defined radio module. I have had great success with this device. One caveat is that the SDR devices lose sensitivity when they are hot. I have even managed to toast a few devices under harsh circumstances.
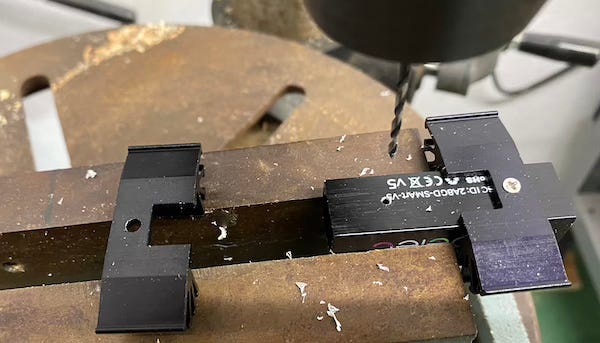
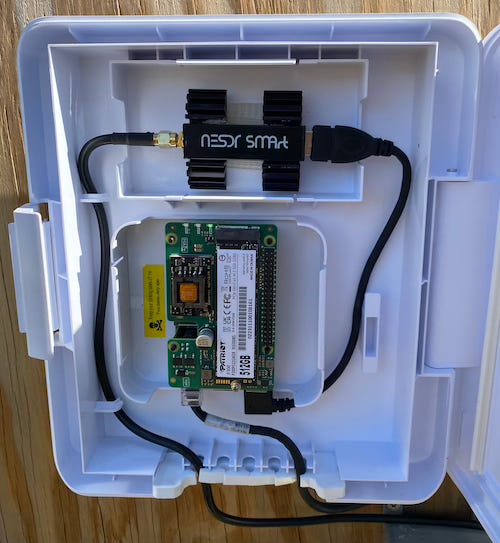
Even though the Nooelec module does have excellent heat dissipation, I opted to add some additional cooling. I disassembled the module, drilled and tapped two holes, and bonded a pair of heat sinks. Maybe this is unnecessary, but I didn’t like how hot the touch the metal case got in the warmer weather.
I also bought a 1090MHz antenna kit and Gas Tube Lightning Arrestor from Amazon. These are not perfect solutions, and I am investigating a better way to protect the hardware from lightning strikes.
The Enclosure
I already had a few enclosures sitting around my workshop. One of my favorites was the Sixfab IP65 box, which I used on my earlier water system projects. The downside to this box was that it didn’t have enough volume for heat dissipation.
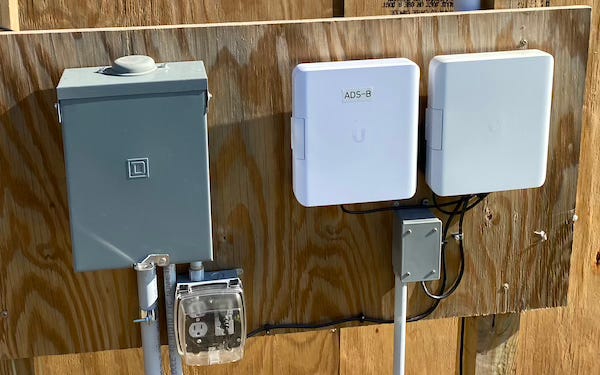
I returned to my shop and discovered a much better option: the Ubiquiti USW-Flex-Utility box. I had already used several of them around the farm and was satisfied with how well they held up in the Arkansas weather. They also looked great.
Using industrial Velcro strips, I mounted the Raspberry Pi, the active cooler, HatDrive POE+, and SDR. Plenty of space for air movement, and the final product looked very clean.
Modern Software
As I mentioned above, my previous project used a preconfigured image from ADSBexchange, which proved to be a significant pain to update.
Given the processing power of the Raspberry Pi 5, a better solution is to use the Docker containerization platform. Fortunately, the folks at SDR Enthusiasts have provided excellent step-by-step instructions on setting up your Raspberry Pi to run ADS-B using Docker containers.
Follow the instructions above; they even provided a script to install docker.
bash <(curl -s https://raw.githubusercontent.com/sdr-enthusiasts/docker-install/main/docker-install.sh)Because I have done this a few times, here is how I do it.
sudo apt update
sudo apt-get upgrade

sudo apt-get install ca-certificates curl
sudo install -m 0755 -d /etc/apt/keyrings
sudo curl -fsSL https://download.docker.com/linux/debian/gpg -o /etc/apt/keyrings/docker.asc
sudo chmod a+r /etc/apt/keyrings/docker.asc

# Add the repository to Apt sources:
echo   "deb [arch=$(dpkg --print-architecture) signed-by=/etc/apt/keyrings/docker.asc] https://download.docker.com/linux/debian \
$(. /etc/os-release && echo "$VERSION_CODENAME") stable" |   sudo tee /etc/apt/sources.list.d/docker.list > /dev/null
sudo apt-get update
sudo apt-get install docker-ce docker-ce-cli containerd.io docker-buildx-plugin docker-compose-plugin

# add your user to the docker group.
sudo usermod -aG docker $USER

# logout and log back in.
logout
Then, check that it is installed correctly.
docker version
docker compose version
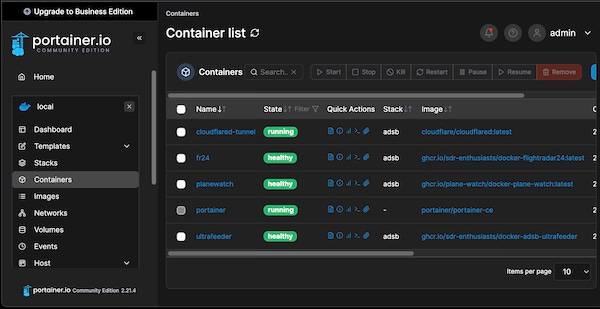
I personally like to add in Portainer Community Edition to make my testing easier.
sudo docker run -d -p 9000:9000 --name=portainer --restart=always -v /var/run/docker.sock:/var/run/docker.sock portainer/portainer-ceThen I pick up here from the SDR Enthusiasts gitbook, which covers setting up the SDR modules and the application environment. After you deploy the ultrafeeder container, you can access a website on your host machine at port 8080.
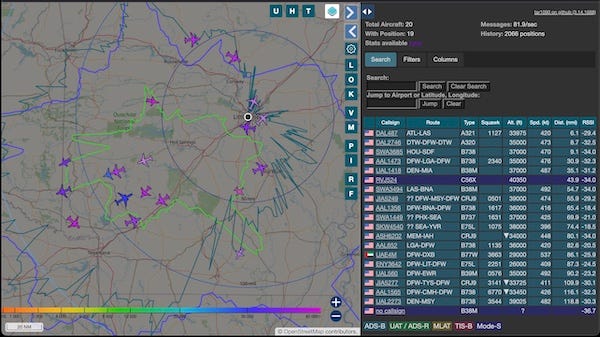
These are a few web pages made available. More info about Tar1090 can be found here.
http://my_host_ip:8080/ : tar1090 map and table of all aircraft received

http://my_host_ip:8080/graphs1090/ : page with graphs and operations statistics of your station

http://my_host_ip:8080?pTracks : showing all aircraft tracks received in the last 24 hours

http://my_host_ip:8080?heatmap&realheat : showing a heatmap of all aircraft in the last 24 hours

http://my_host_ip:8080?replay : showing a time-lapse replay of the past few days
Cloudflare tunnel
Another thing I would like to add to my project is the ability to access the tar1090 map remotely. Since I am running over Starlink and have all sorts of security added in with Ubiquiti, I found that the best way to do this is with a CloudFlare Zero Trust Remote Tunnel.
I won’t go into too much detail here; it’s a standalone topic that is pretty well documented on the Internet. Cloudflare tends to change its webpage frequently, and sometimes, it takes a few tries to figure out where things moved to.
Here is one piece of information that took me some research to figure out. If you want to deploy the Cloudflare tunnel with your other Docker containers, you can add the following to the list of services in your docker-compose.yml file.
 cloudflare:
    image: cloudflare/cloudflared:latest
    container_name: cloudflared-tunnel
    restart: unless-stopped
    command: tunnel run
    environment:
      - TUNNEL_TOKEN=<your cloudflare token>
    depends_on:
      - ultrafeeder
    tmpfs:
      - /var/log
Watch the skies everywhere!
Currently, my ADS-B system is sharing a few aggregators like Plane Watch and FlightRadar24. I will try to add a few more services as I get more time.
Since it is so close to the greenhouse, one of my plans for the device is to run a Docker container with irrigation control software, possibly OpenSprinkler Pi or SIP. I have a project in mind to use a system to communicate to the irrigation valves using LoRa or LoRaWAN radio. But that’s for a later adventure.
Mr. Programmer
I got my hammer
And I am going to
Smash my
Smash my
Radio— Joey Ramone


The pineboard NVMe unit went tits up, after a nearby lightning strike, I wanted to send them the unit so they could do some postmortem analysis, (does anyone still do this) and their store at https://pineboards.io/ is no long online..
more on POE isolation http://www.embeddedpowerlabs.com/Downloads/APEC_2006_PoE_Electrical_Isolation_Requirements.pdf